A Year of Renovating
I’m writing this post from my office at the Farm, sat at a desk that is currently scattered with a myriad of samples - from paint pots to carpet swatches, a few tiles, a box of handles and some castors for a project I’m working on for the Cottage bathroom. Being surrounded by piles of samples is a stage of renovating that has often felt completely out of reach, and is really a reminder of how far we have come with the renovation of the Cottage, whilst also being a sign of the exciting times ahead. We’ve been renovating the Cottage for just over a year now, after moving in to the Farm in April 2021. We spent the first few weeks of living here in that feeling of ‘new-home-chaos’ that anyone who has moved house will know well - perhaps heightened by the fact that we had moved not one house, but three into a completely new location. We spent a few weeks settling in and inviting our family and friends to come and see the sprawling Farm we had just bought, before taking a hammer to the very first wall in mid June.
We’re now coming to the end of June 2022, a year and two weeks since we started making a mess in the Cottage, and I thought it would be good to take a moment to reflect on where we have been, and the work we have done over the past 12 months. When you’re renovating, the all-consumingness of dust and dirt can be draining, so it’s important I think to stop for a second, assess what you’re doing and what you have achieved before taking the next steps forward. Plus, with a project of this scale, I’m all about celebrating the little wins, and I think a year of renovating is certainly something we should be celebrating!
We began work on the Cottage by starting in the lounge. When we finished our last renovation, where we had started work on the ground floor and then moved onto the upstairs and bedrooms, Will and I vowed that never again would we work from the ground up. Instead, our intention was to start from the top of the house and work our way down. The reasoning for this is simple: when you make a mess, you make dust and dirt, and gravity will naturally pull that dust down… even if what’s below is a newly renovated space you just finished a few weeks before! ‘Never again’ we said, and yet here we are a year into the Cottage and we have done the exact same thing again. The difference this time though, was that we have been clever enough to realise our mistake mid-way through, and so whilst the lounge was the first room to be started, it will more than likely be one of the last to be finished. I will add, at this point, that unlike in our last renovation when we started at the bottom simply because of our naivety, this time it was with a ‘plan’ in mind. Though with hindsight, the plan was wrong and we should have stuck to our guns!
We started with the lounge because it was the easiest room to close off, leaving upstairs relatively unscathed, if a little dusty, for friends and family to use as we needed. We had already decided the kitchen, which leads off from the lounge, would remain untouched in the renovations as we simply don’t have the budget for a new kitchen, and this also would mean guests could still use the kitchen if needed. This was a great theory, and actually worked relatively well for us in the summer months. However, that plan rapidly unravelled when we discovered some dodgy pipework buried in the concrete floor of the lounge, which resulted in all the water in the house needing to be completely switched off, meaning no heating or hot water for those brave enough to sleep in the Cottage. This might not sound so bad, but bare in mine we live on a very high hill in rural North Yorkshire, and at that point the Cottage was completely uninsulated with quite large holes in lots of the windows… cold doesn’t quite cover it. At one point, my brother stayed in one of the bedrooms, and slept in his down jacket and bobble hat!
Anyway, anecdotes of chilly sleepovers aside, the lounge was a steep learning curve for us. Hidden behind the seeming ‘alrightness’ of the room was a significant amount of damp, the extent of which only became truly apparent once we had stripped the room of its furniture, carpets, and curtains. Black mould covered the back wall, paint was peeling and the textured cement render that covered the external walls had blown.
This was the point when we realised that we wouldn’t simply be able to give the Cottage a face lift, but would need to take it back to the stone, one room at a time.


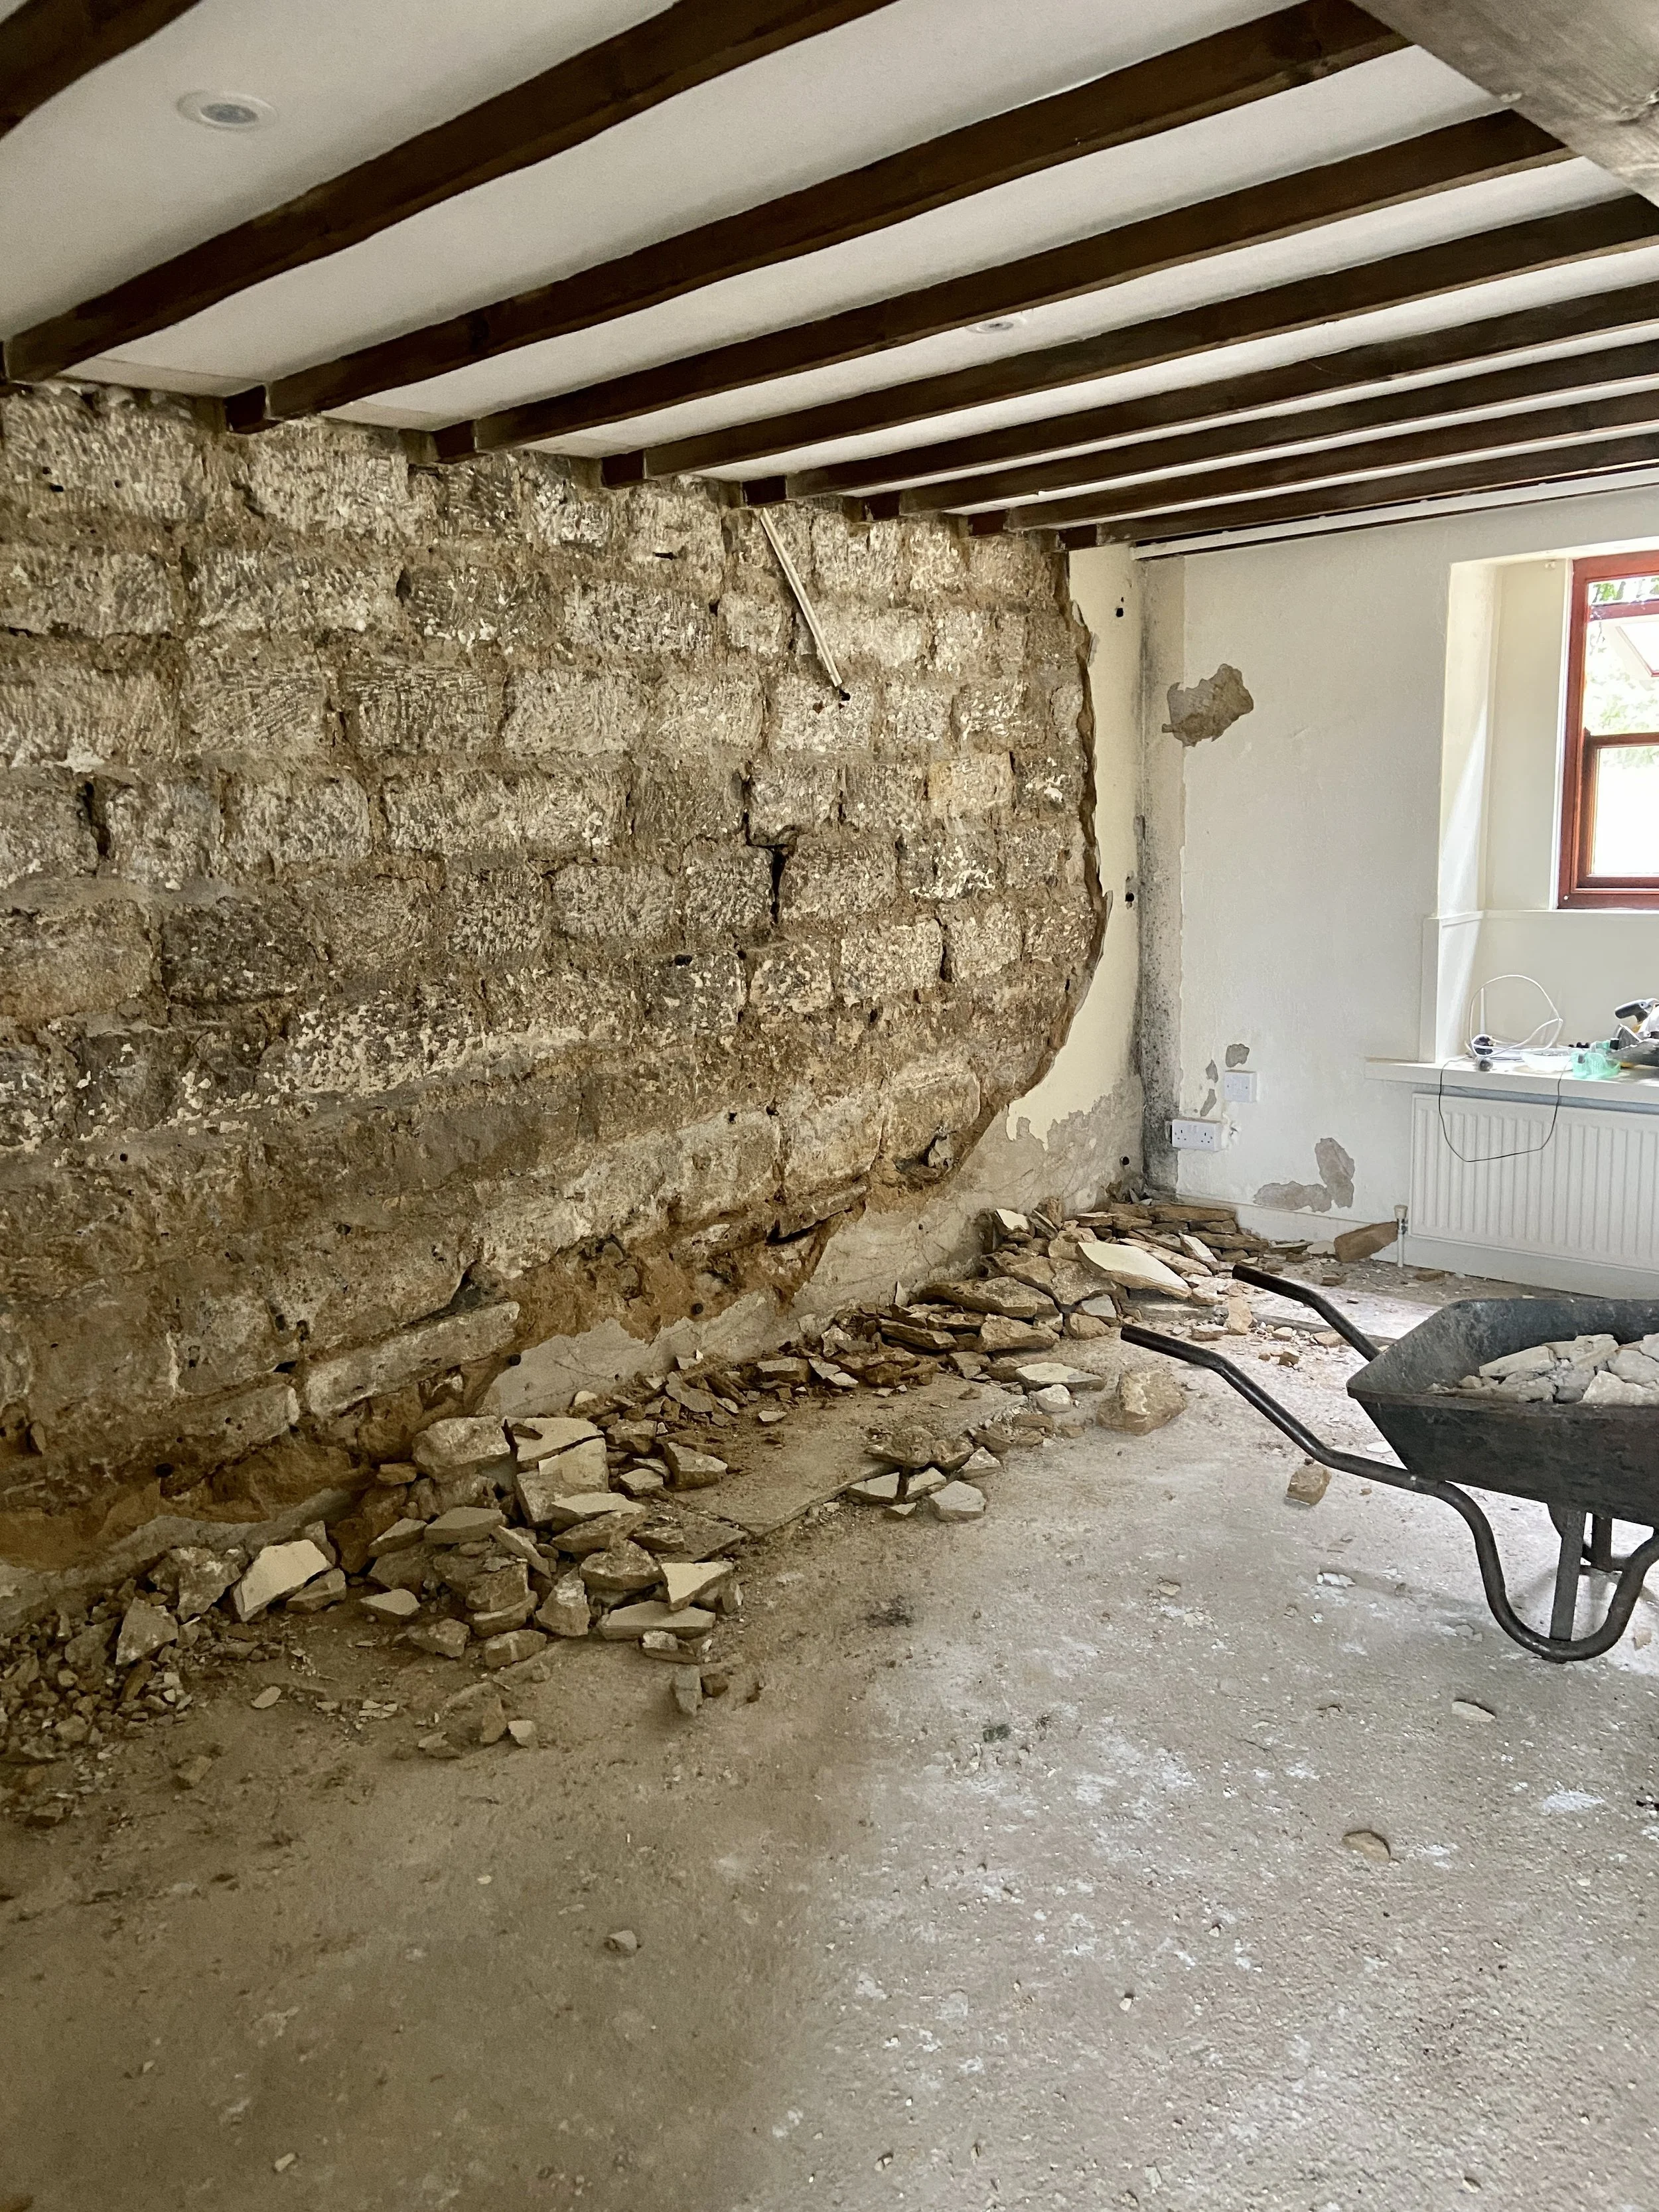


We began the process of removing the render that coated the stone walls, in the process removing an 80s stone built TV stand, and uncovering three layers of tanking on the lounge wall. We started to delve into the world of Lime, traditional building techniques and materials. We removed any cement pointing, cleaned distemper from the stone and repointed in lime mortar. We then used Cornerstone Insulating Render from Cornish Lime on the external wall, and CLM28/CLM66 on the party wall between the Cottage and the Mistal. As the internal walls in the Cottage are stud or aircrete block work, they don’t need to breathe and so we skimmed them with gypsum to cover the textured, artex-like render. We also removed the existing double doors, and built a new door frame to allow the space to be open plan from the Foyer. We had an Esse 550SE woodburning stove fitted, which will heat the space beautifully in the winter months.


The entrance was the next space we began work on, now affectionately known as the Boot Room. The boot room was just as damp as the lounge, and really dark due to the single wall light that lit it. Removal of the cement render from the thick stone walls uncovered some lovely dressed quoins around the doorway, and we knew we had to keep these exposed if we could. We wanted to try using Hemp Lime plaster, we thought this would be a great place to give that a whirl. The Hemp Lime was a very different material to work with compared to the Insulating Render, something I discuss more in my Lime Plastering blog posts, but we were pleased with the finish we managed to achieve and the way I managed to shape the plaster to show off the stonework. We’ve also added additional lighting to the space to brighten it up, and changed the arched doorway through to the foyer to square, giving much needed additional head height.


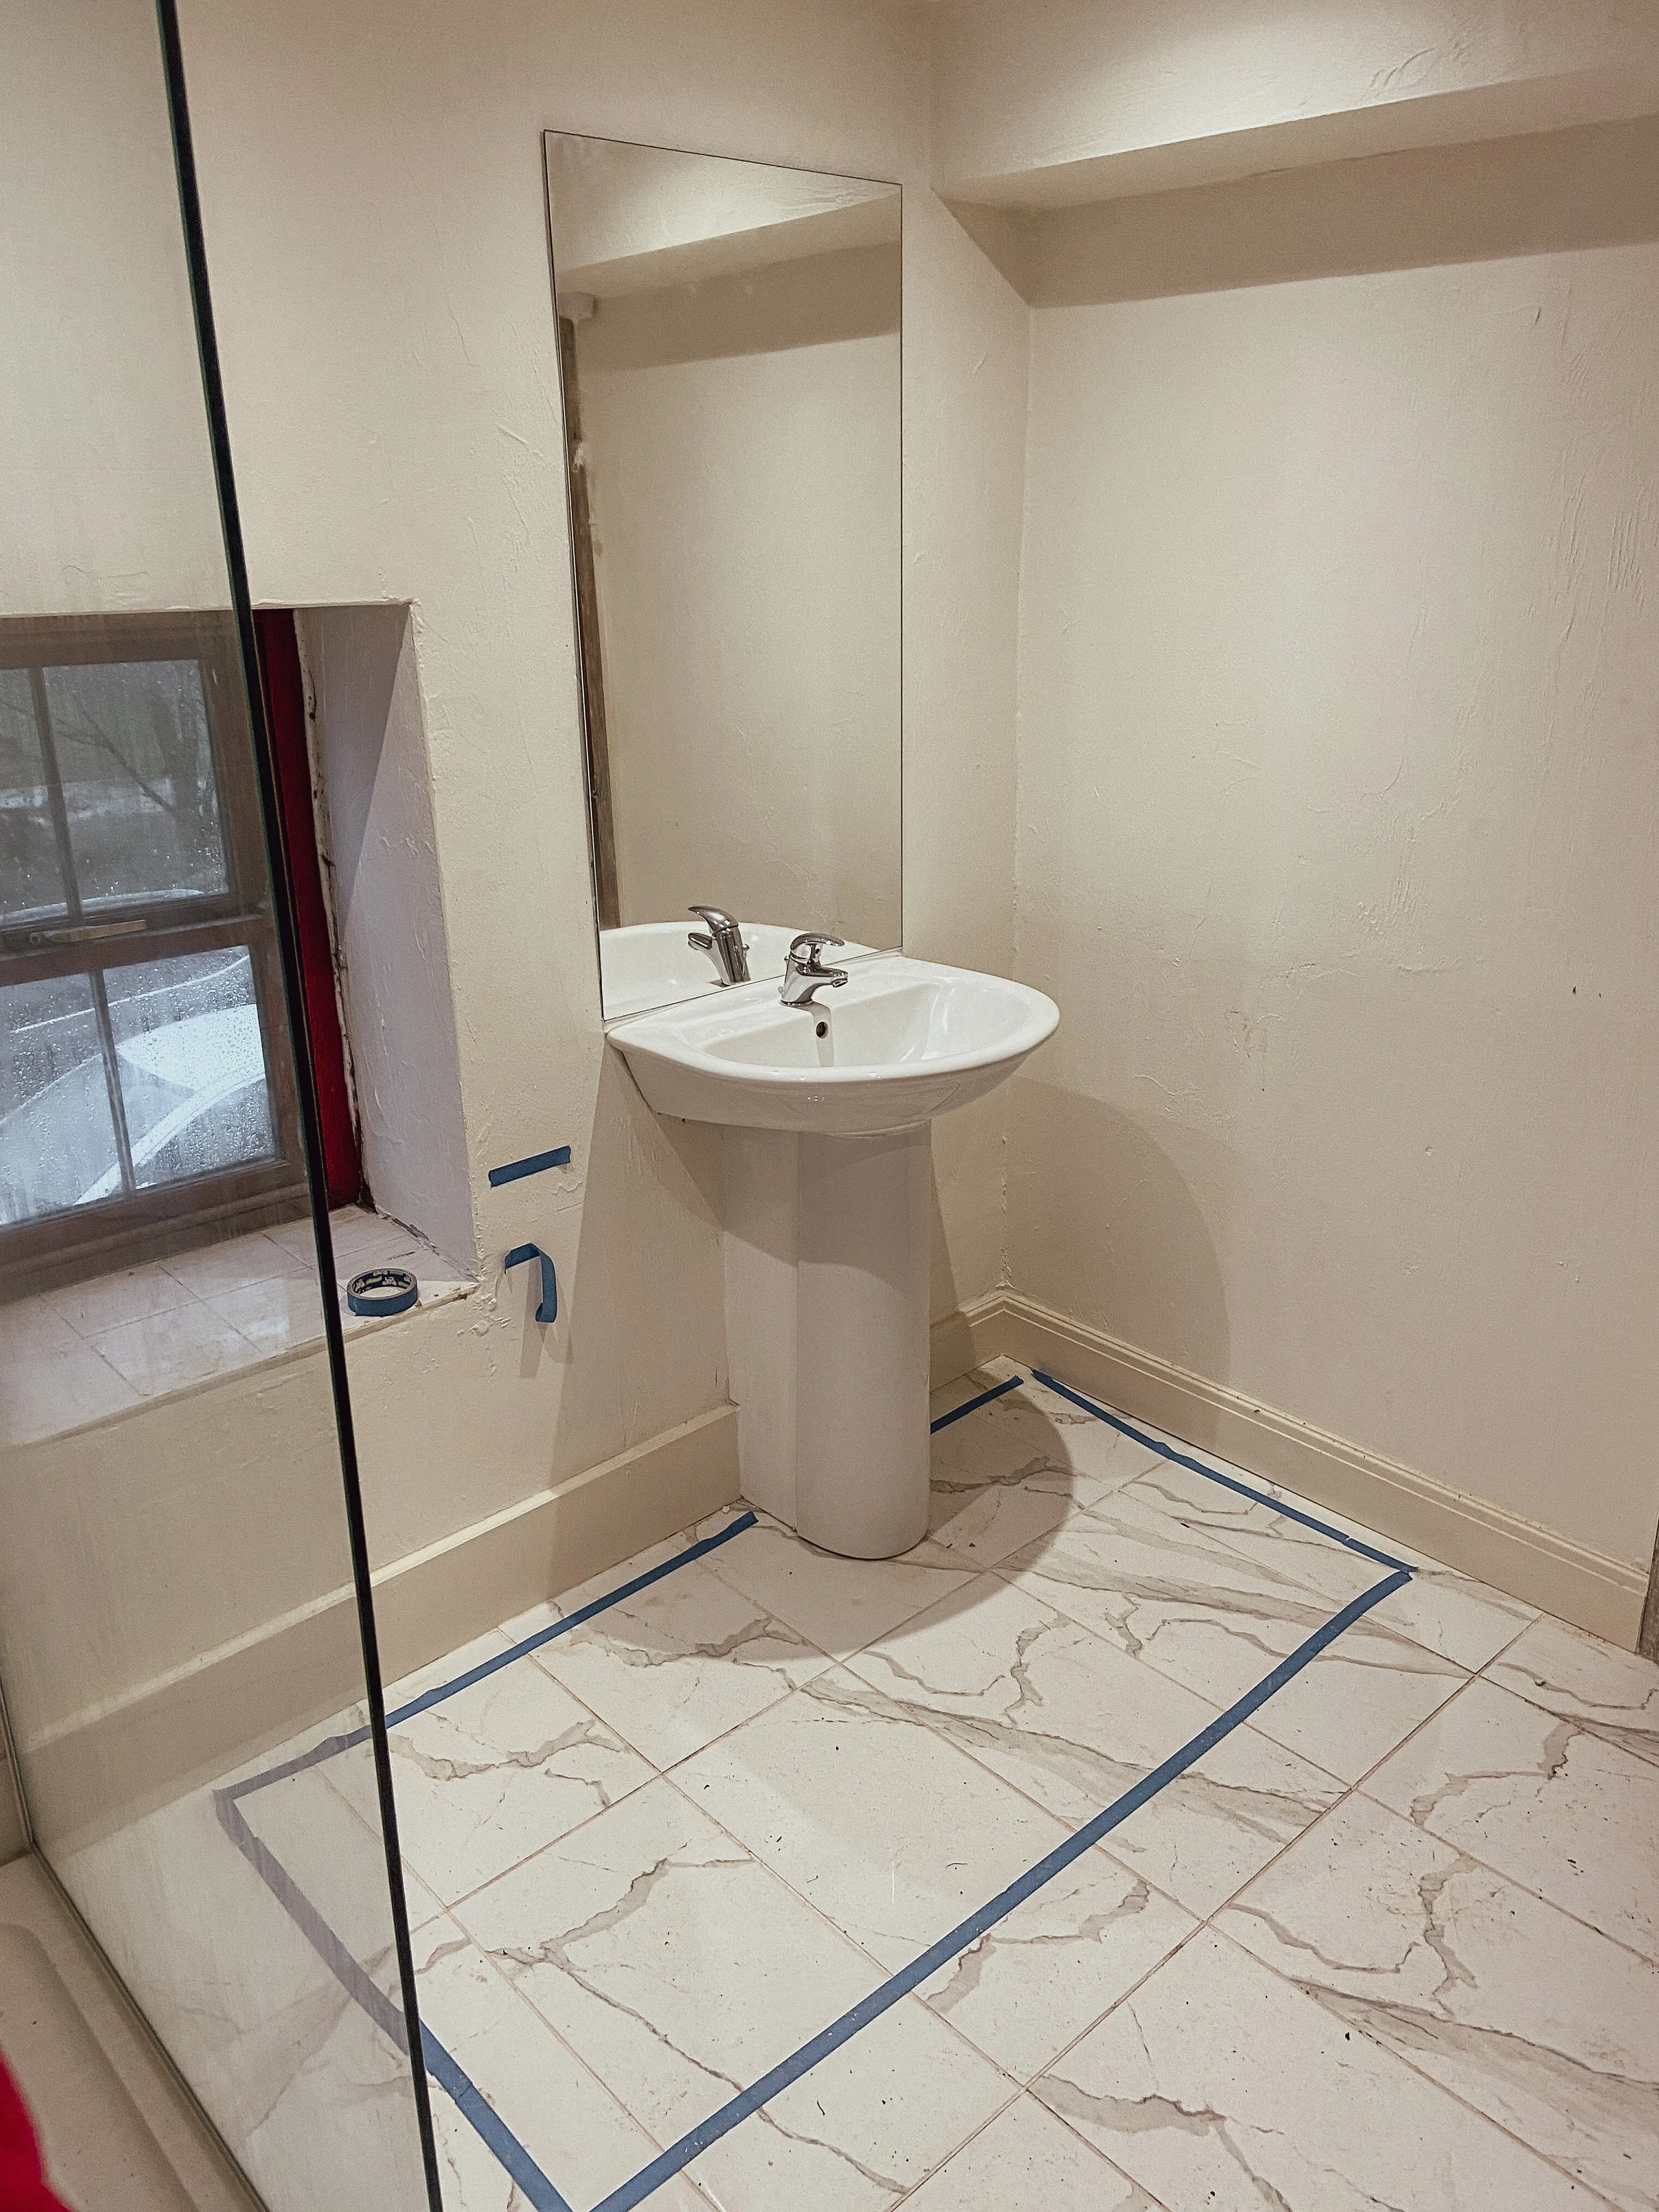
The downstairs bathroom, which I call the Cloakroom, was a pretty easy room to tackle as it’s almost entirely internal walls. It leads off from the boot room, and has an external wall that is approximately 1m wide x 2.2m high, with a window in the middle of it. As the area of the external wall is so small, and has the added complication of pipework and soil stack for the upstairs bathroom running up one side, we didn’t feel it was worthwhile stripping this back to the stone and replastering with Lime. There are no signs of damp in this room, so we have left the plaster as is, and just skimmed the texture with gypsum. Saying we have ‘left it as it is’ is perhaps a slight understatement though, as we have removed the original sink and toilet, built a frame for a false wall which will conceal all the pipework (originally this was surface mounted), and have plumbed in a new sink and toilet. We have also fitted a towel rail, and added spotlights as the room was previously lit by a single wall light. This room is on hold now, like all of downstairs, until we have made good progress on the upstairs!


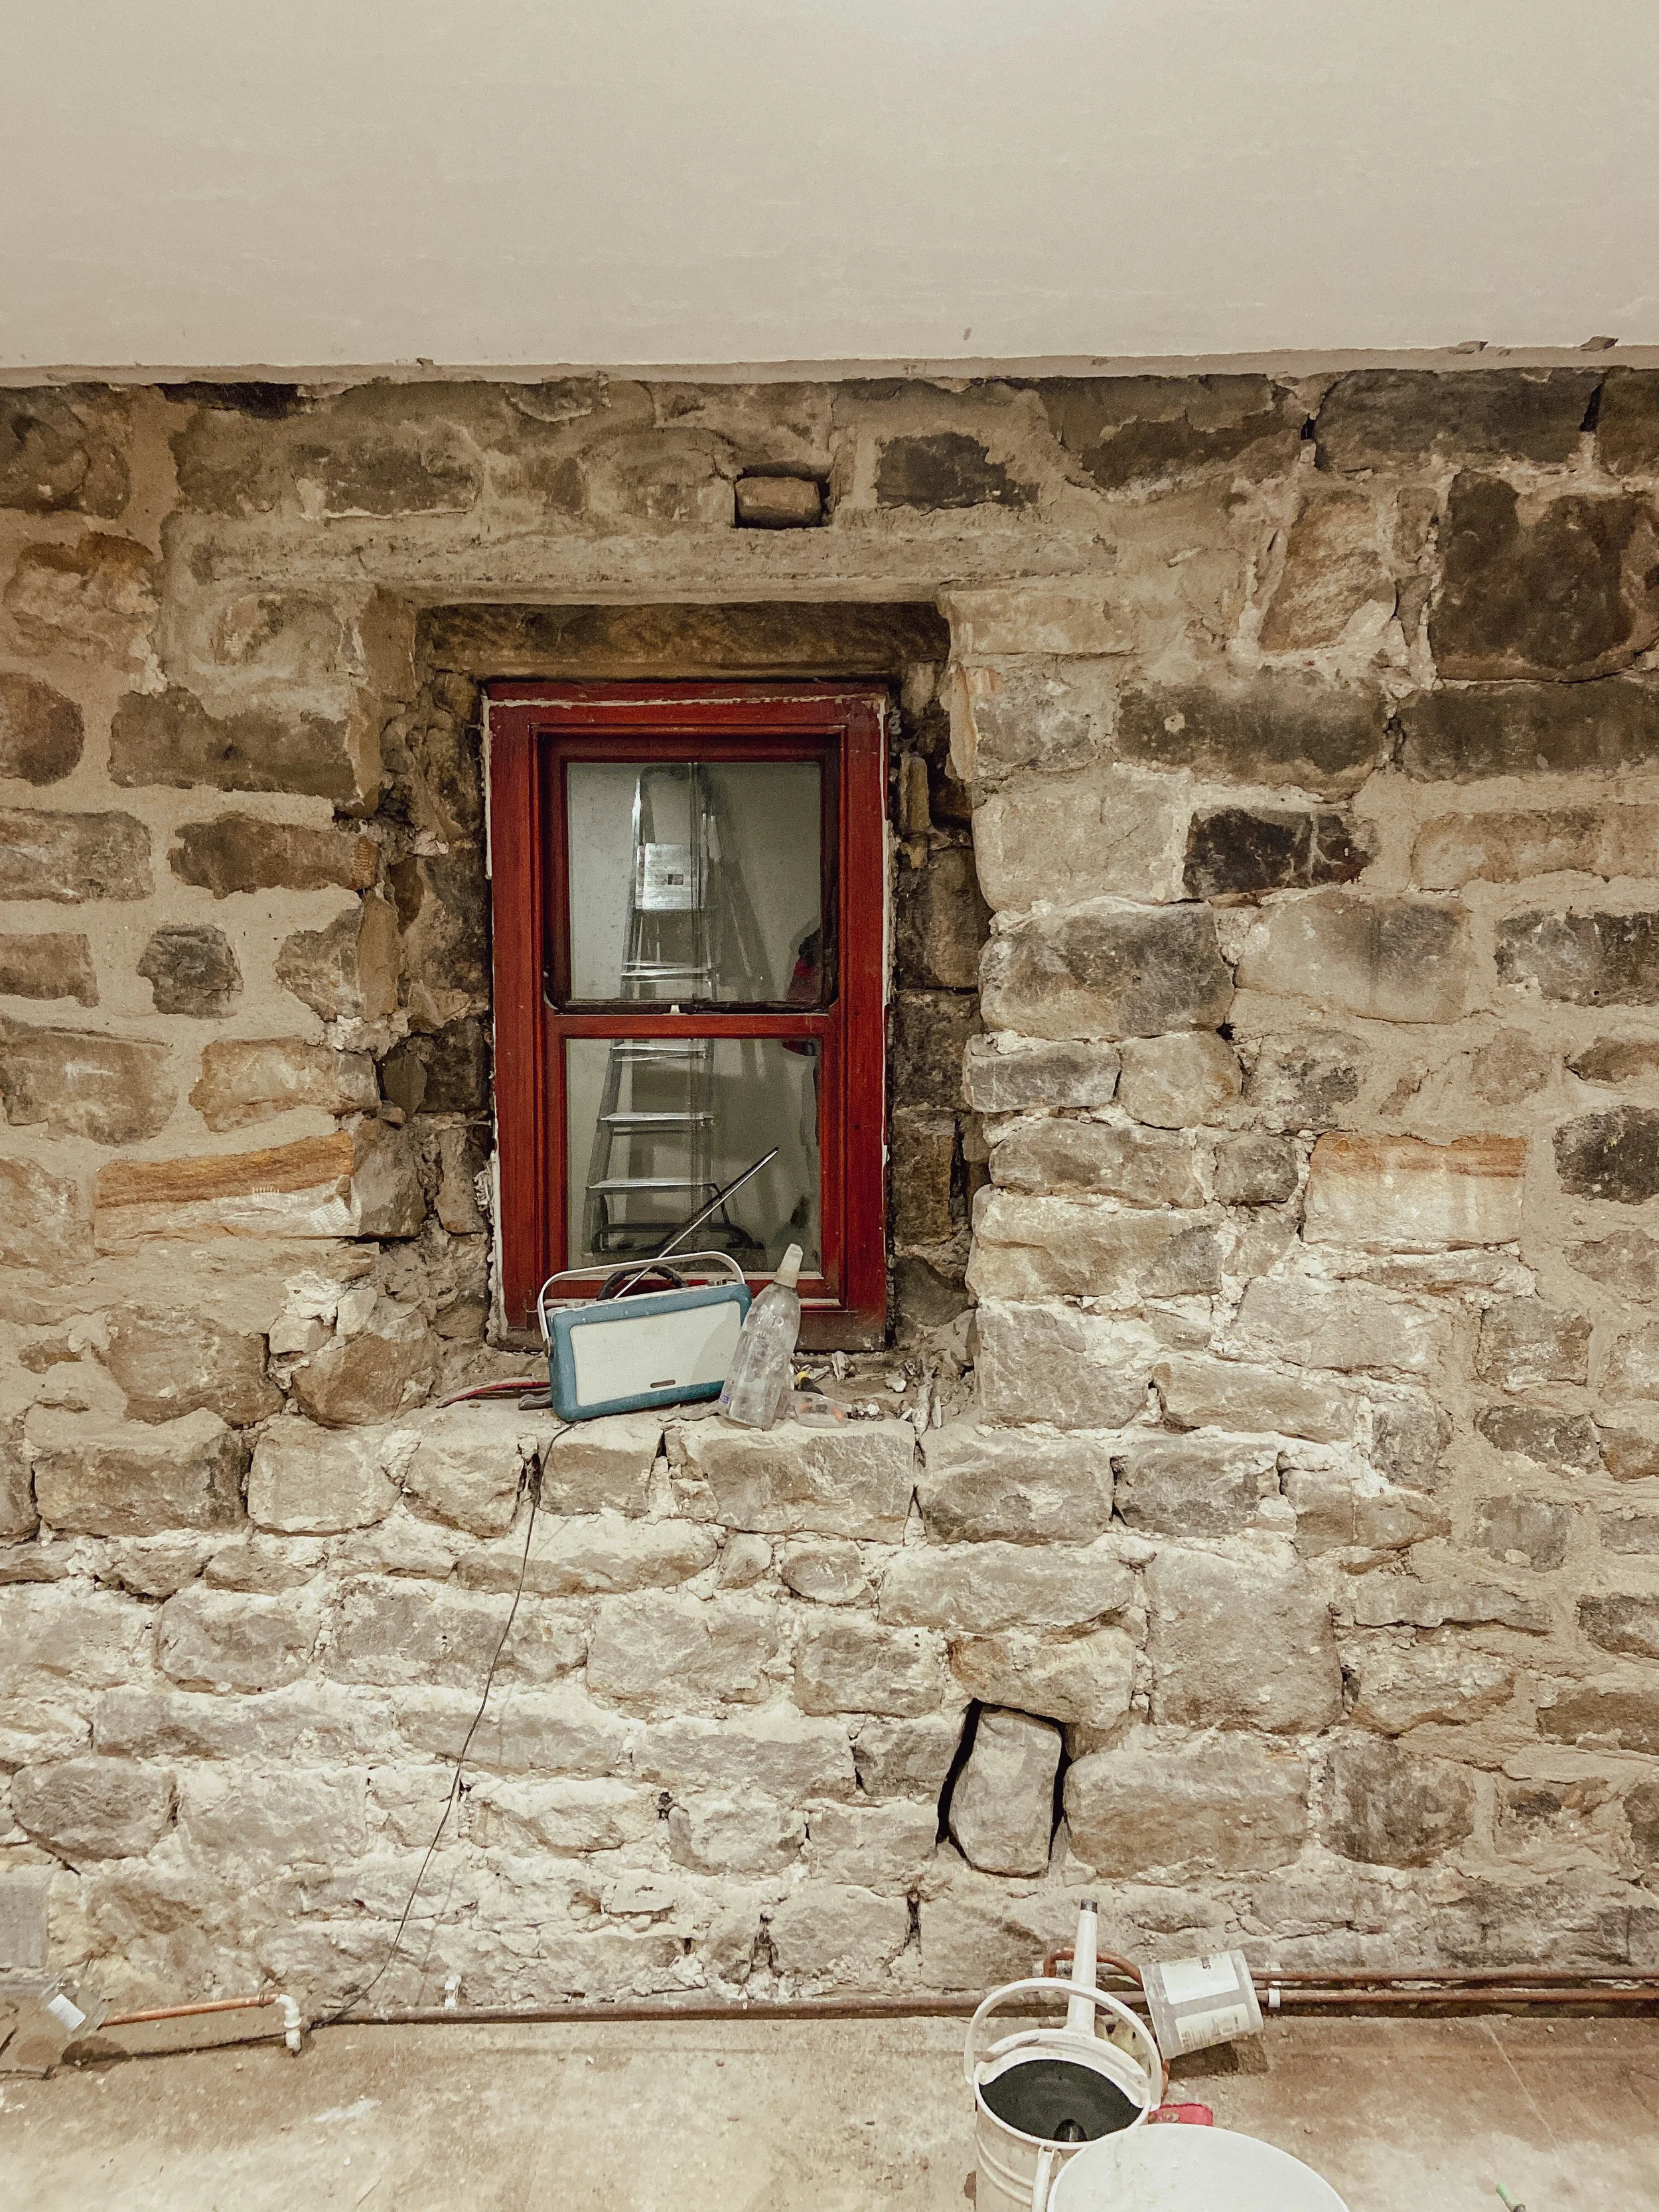
Next up is the Foyer, a name that still sounds a little grand for a two bedroom cottage in the Dales. We call it that because really there’s no other way to describe it. Really, the foyer is a room in and of itself- an oversized, rather grand double height space between the bootroom and the lounge with an enormous barn window offering beautiful views over the gardens, and a staircase leading to the mezzanine, bathroom and bedrooms. When we viewed the Farm, the foyer housed a dining table and chairs, against a window seat built into window. However, the table blocked the staircase, and made for a very awkward walk-through. Large shutters hid the view from the window, which when folded back blocked the staircase. We ripped out the shutters and the window seat, finding the original stone threshold underneath a breezeblock wall from when the window would have been the main door into the barn. The threshold is beautifully worn and dipped from years of heavy boots and hooves passing over it, and is now one of my favourite features at the Cottage. A couple of weeks ago, we finally knocked out the section of stonework under the barn window, which will allow us to restore the window to full height when it is replaced later this summer.
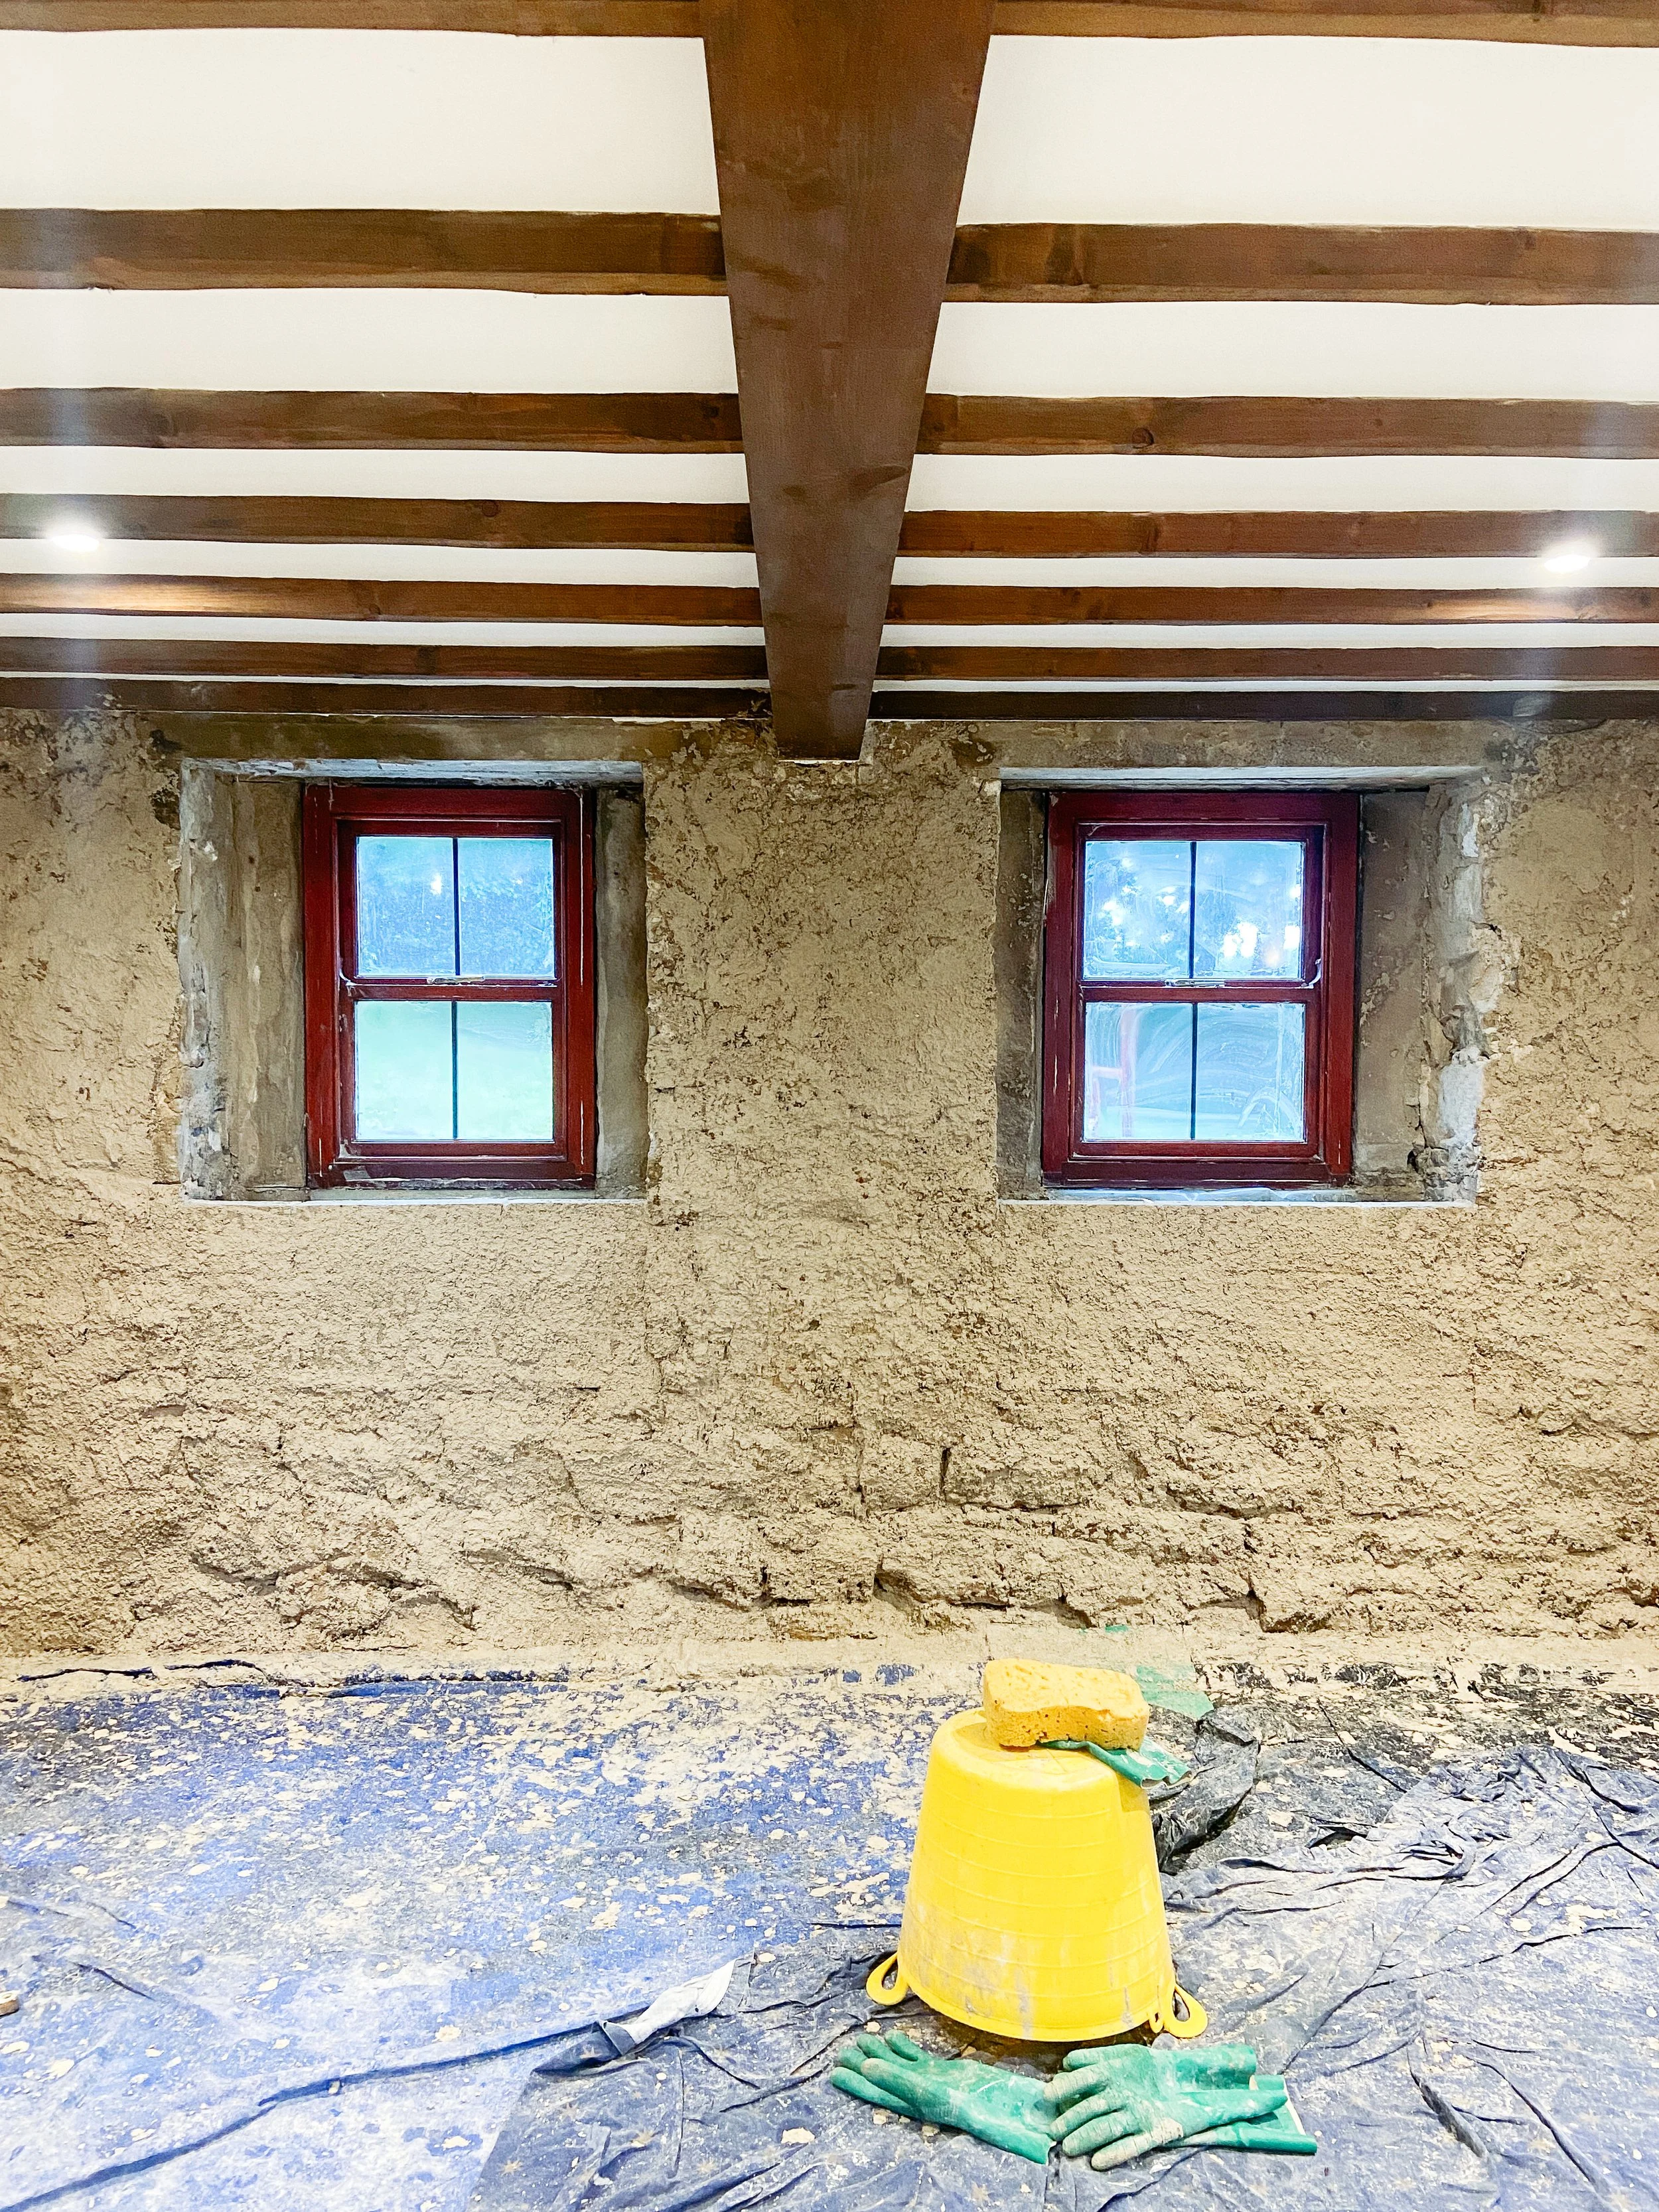
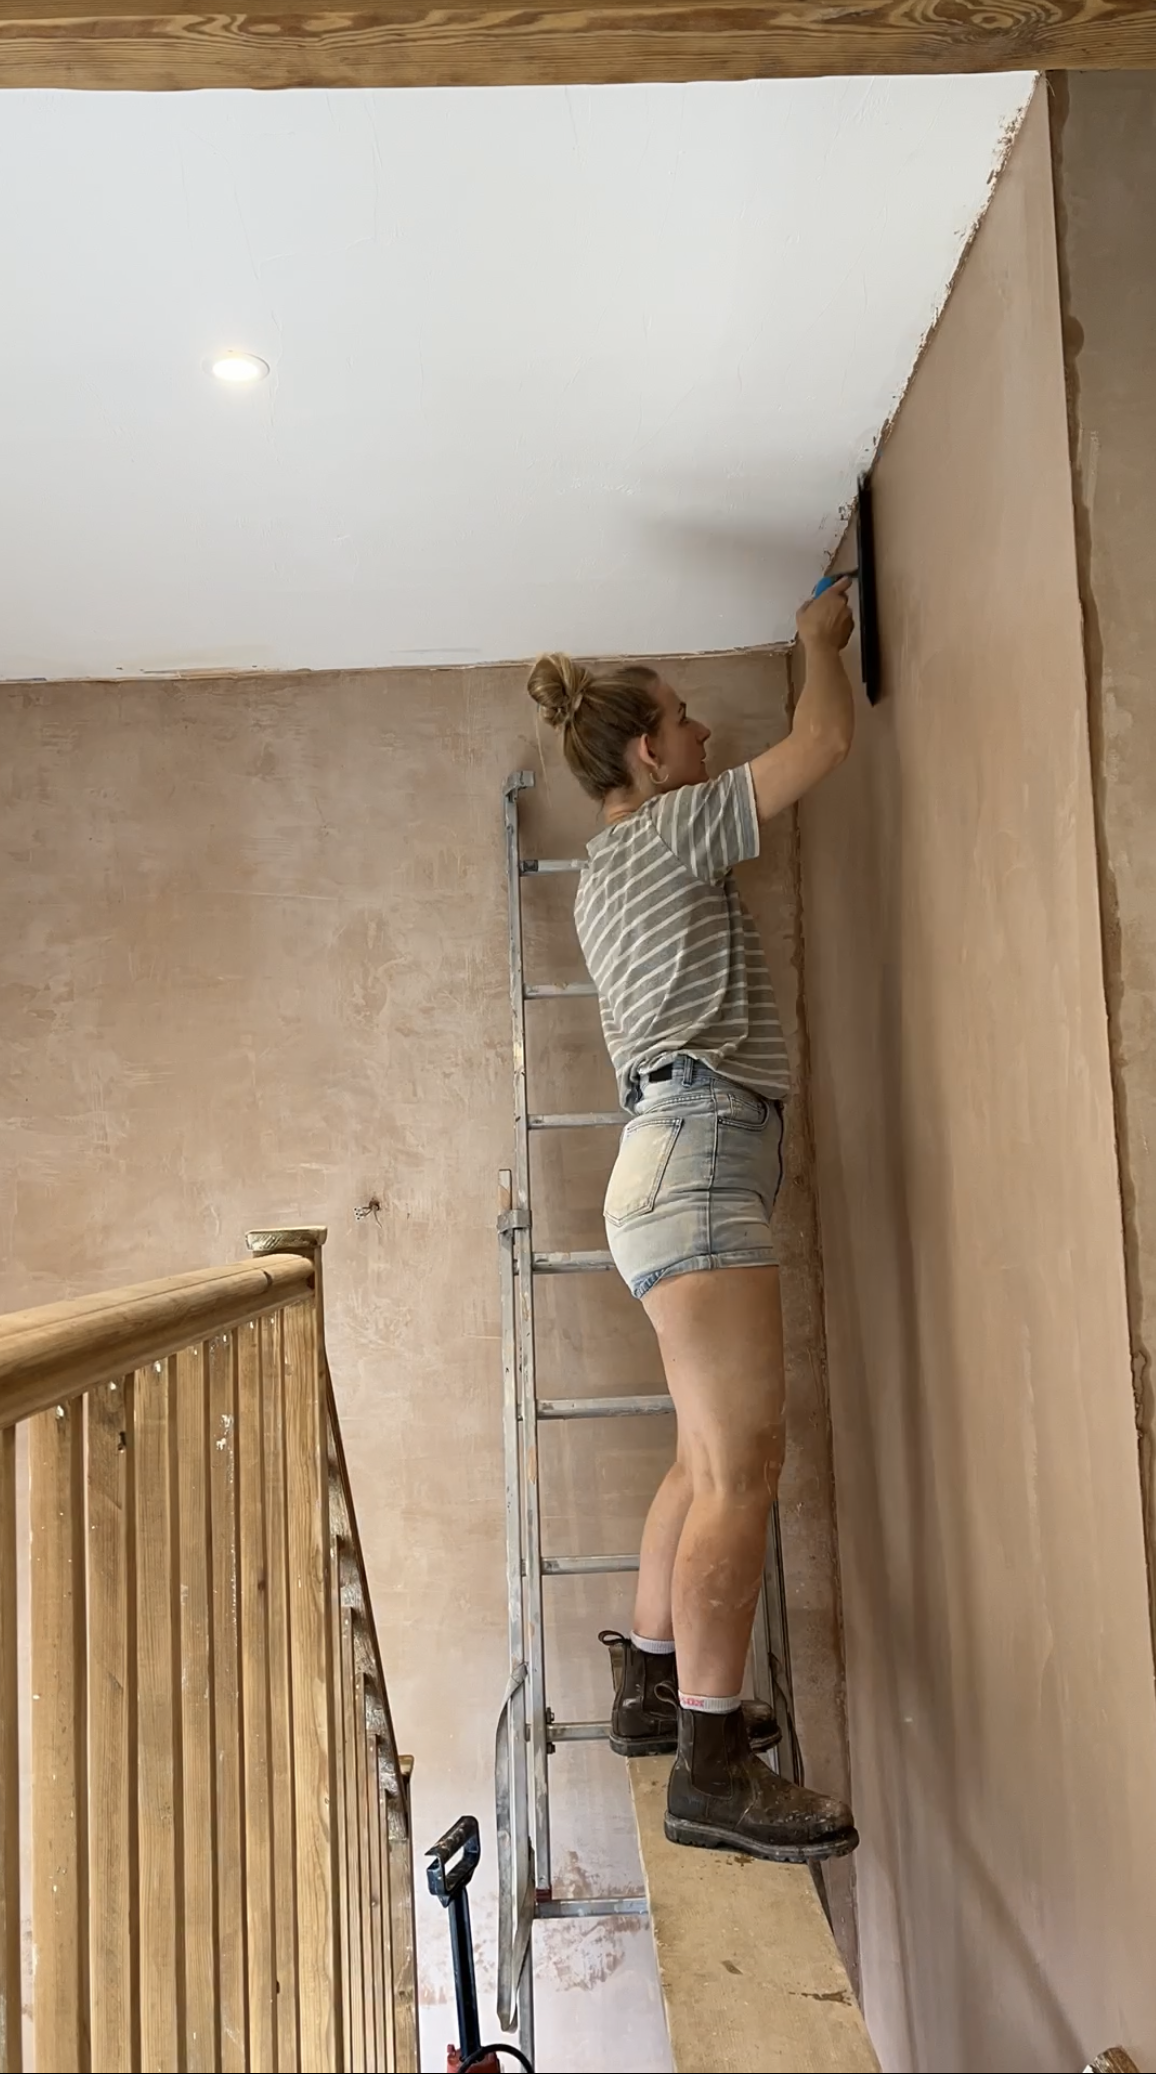
Being double height, the foyer was half rendered with the top half of the wall exposed stone with cement pointing. We knocked off the render, to uncover yet more beautiful dressed stone quoins around the barn window, and removed the cement pointing, replacing it with lime. We decided to pull focus to the barn window, plastering the rest of the double height wall with Insulating Render, except of course for the stone quoins which we have left exposed. This wall has been scratch and float coated, but is waiting to be skimmed once the barn window has been replaced and once we have gypsum skimmed the ceilings. We have skimmed all of the internal walls in this area bar one, and the staircase has been stripped, the original oak beams sanded back, patiently waiting to be finished once the final skim has been applied.
With the downstairs of the Cottage well and truly ripped apart and partially reassembled, we took a break over Christmas to catch our breath before starting on the upstairs with gusto in January. We well and truly gave up on the idea of any part of the Cottage being inhabitable, and stripped it of furniture, carpets, radiators and whitegoods, which has given us the freedom to make a mess without being concerned for the safety of a chest of draws or flooring! We started work on the two bedroom simultaneously due to them having an unusual ‘interlinked’ format made up of wardrobes that slotted together to form the dividing wall between the two rooms. Bedroom 1 had a particularly curious format, in which you walked into the room from the mezzanine into a tight alcove facing a dark corner, and had to turn back on yourself to walk into the room. This set up just didn’t work for us, so we set about moving the doorway. As the walls upstairs in the Cottage are all studs, this wasn’t particularly challenging, and just involved a lot of cutting back plasterboard and pulling out studs which were secured with the longest, thickest nails I have ever seen!
We moved the doorway into bedroom 1 so that it mirrored that of bedroom 2, and the room is now entered from directly opposite the large barn window, which allows beautiful light to flood the room. Moving the doorway also means that you walk into the room towards a window at the back of the room, and walk out towards the barn window on the mezzanine, connecting the room with the outside in a gentle, unassuming reminder of the land and space outside.


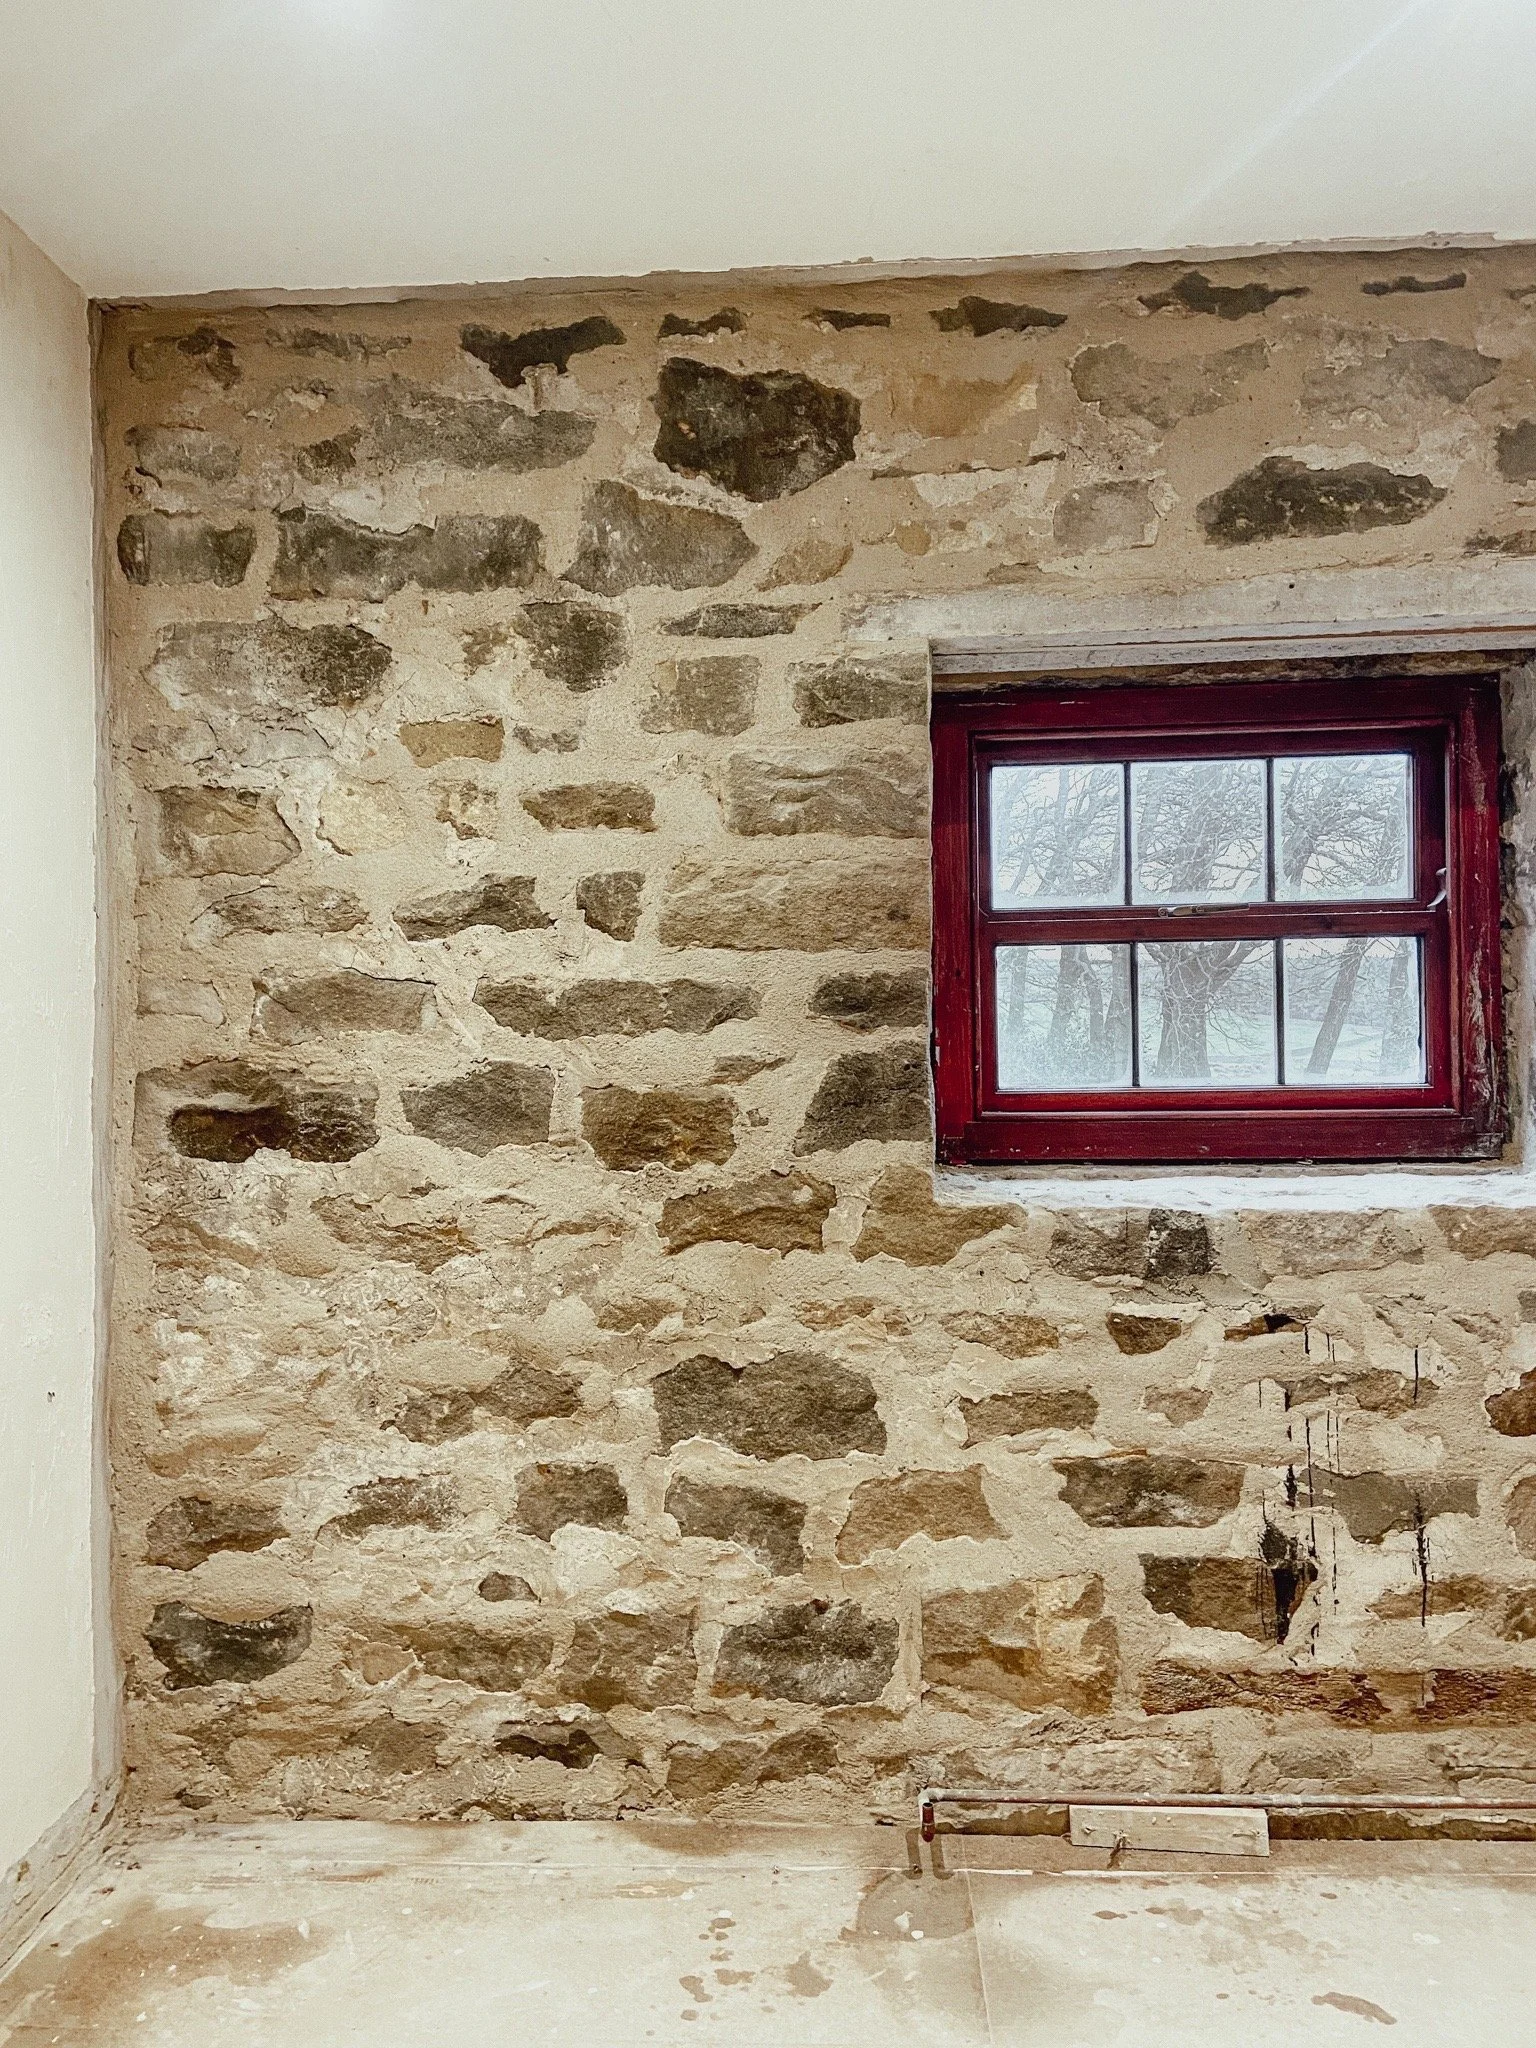


Bedroom 1 was further transformed by the demolition of the interconnecting wardrobes, which has previously cut through the room, giving it an appearance of being particularly long and skinny with barely enough space to squish past the end of the bed. With the wardrobes gone, the room gained close to a meter of width, making it feel much more spacious and open, plus the new doorway leaves plenty of space for a wardrobe in the newly made alcove. Bedroom 2 was simplified as access to the built in wardrobe for this room was via double doors that were blocked by the bedroom door. In both bedrooms, we stripped back the external walls to the stone, repointed in lime, and then plastered in Insulating Render with a skim of lime putty plaster. All of the internal walls and ceilings have been skimmed in gypsum, and these rooms are ready to be painted and decorated once the lime plaster has finished curing, which will be around August.


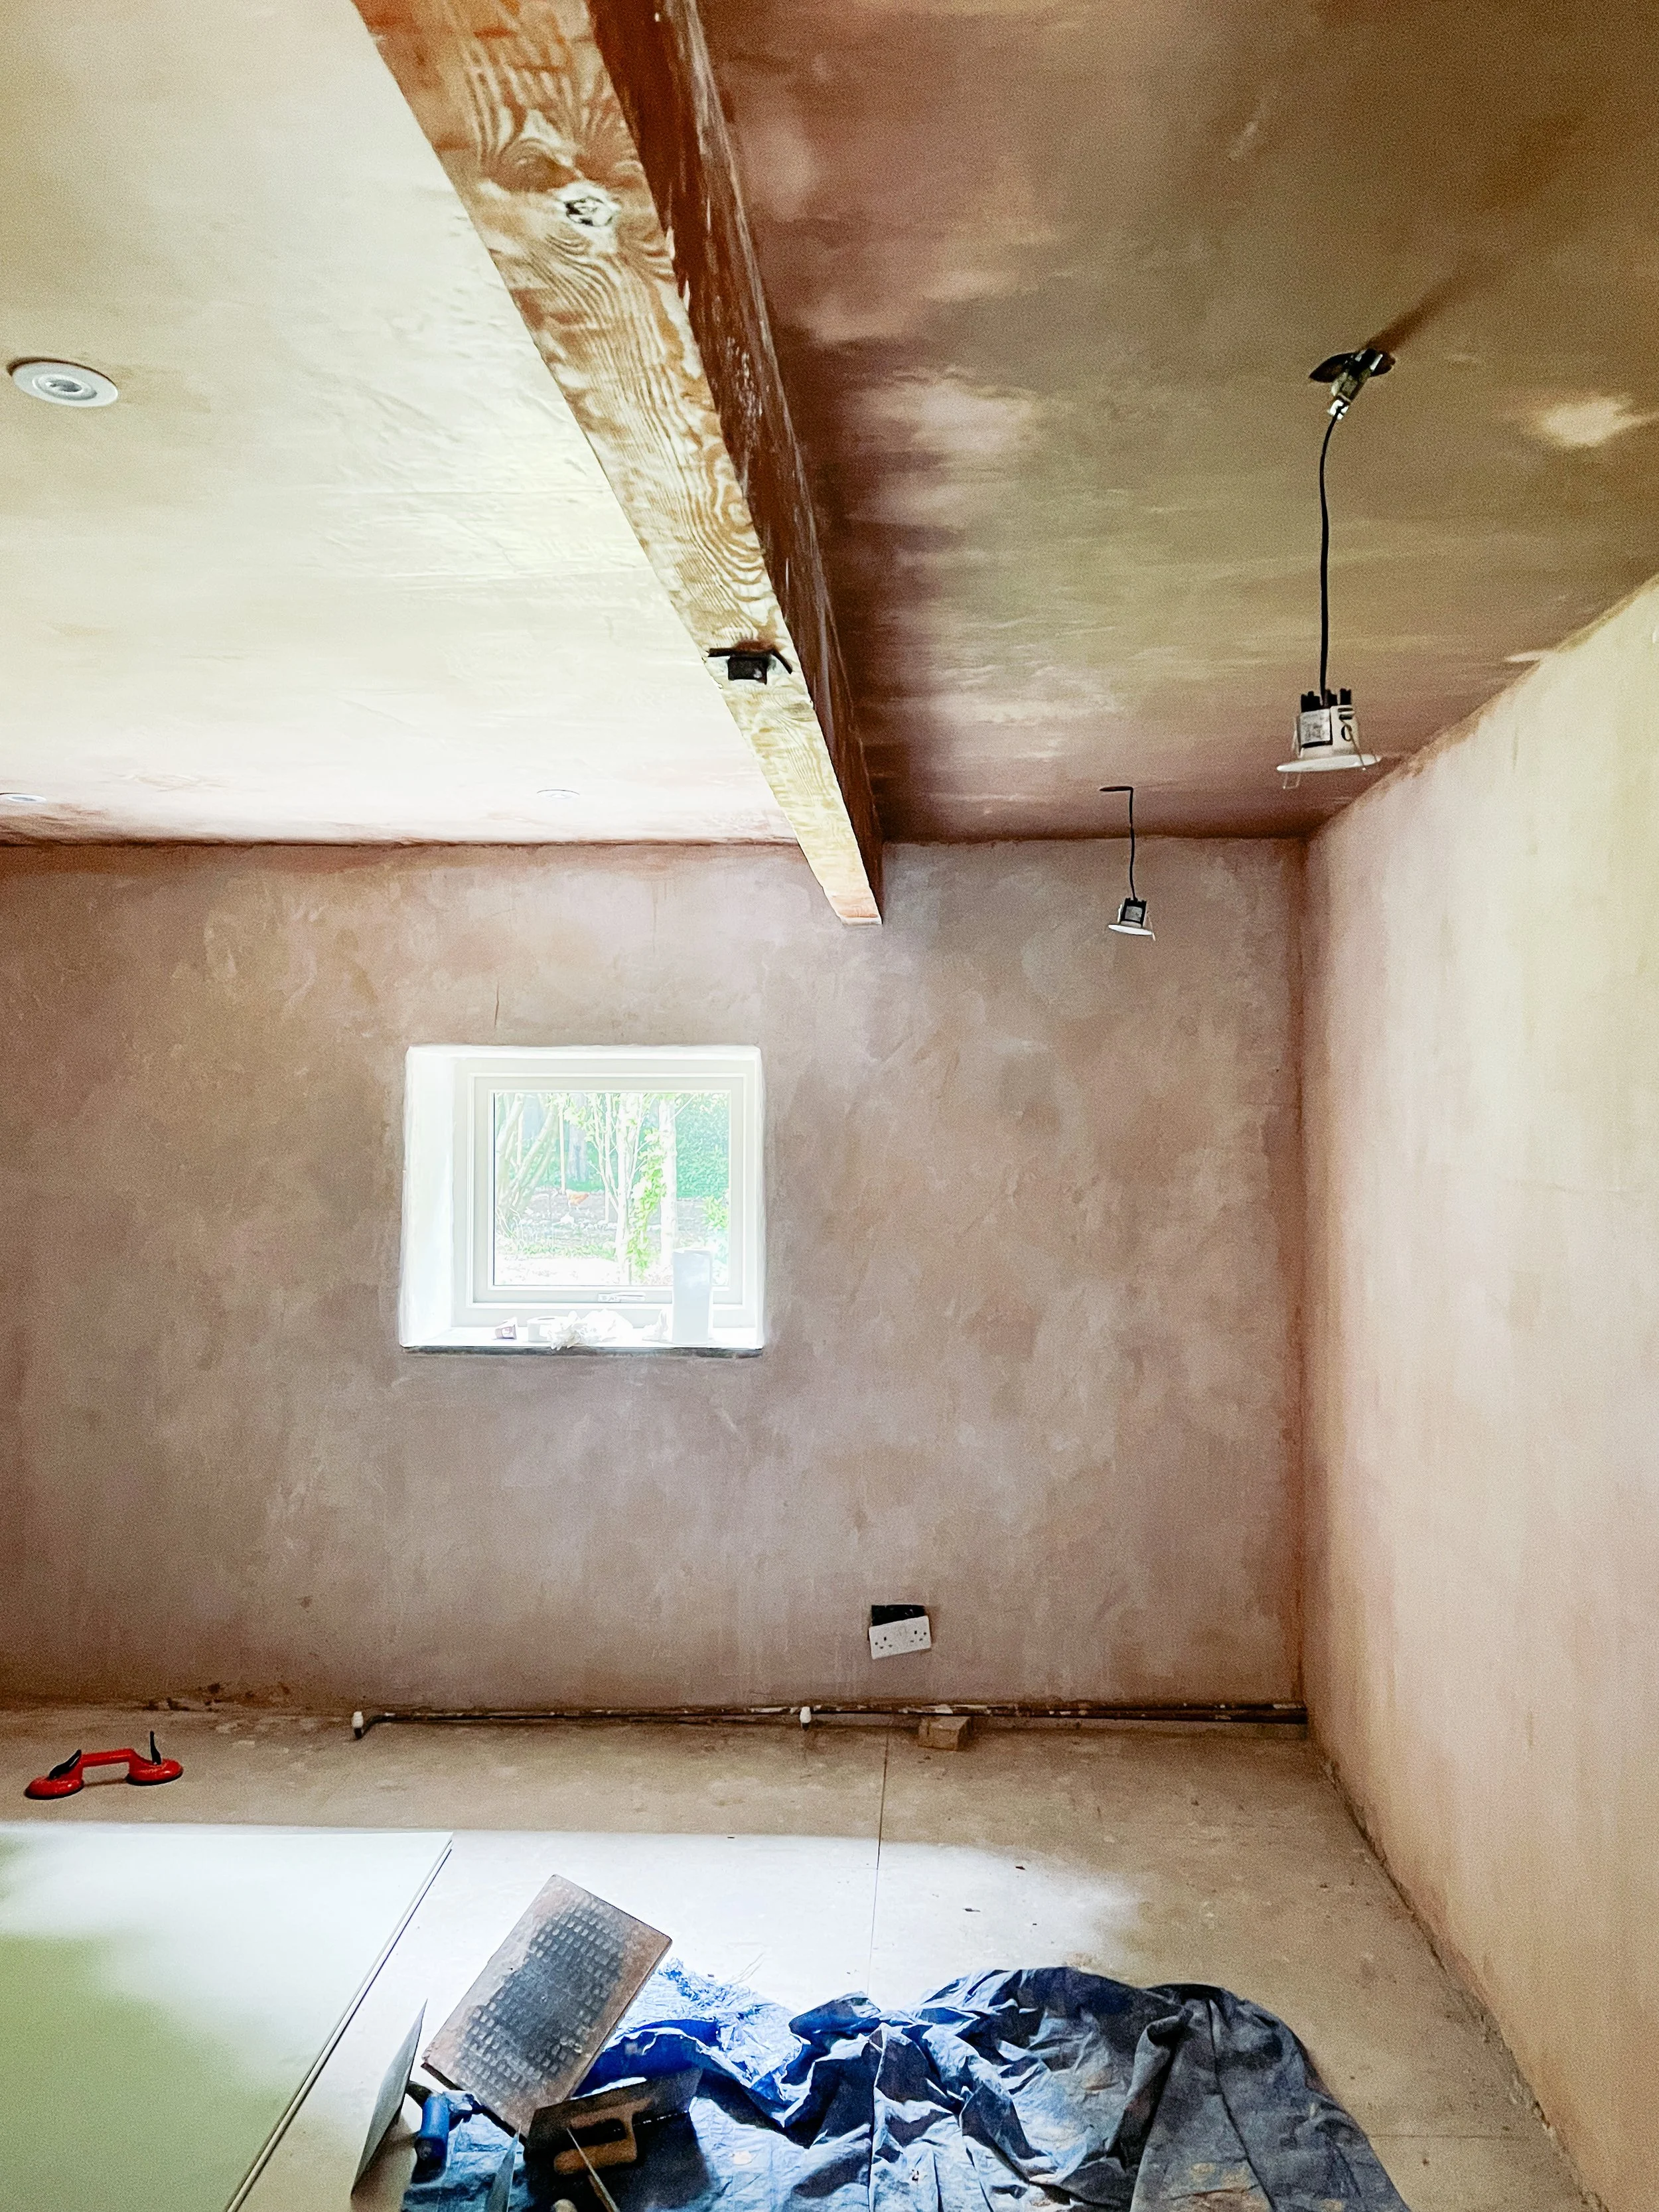
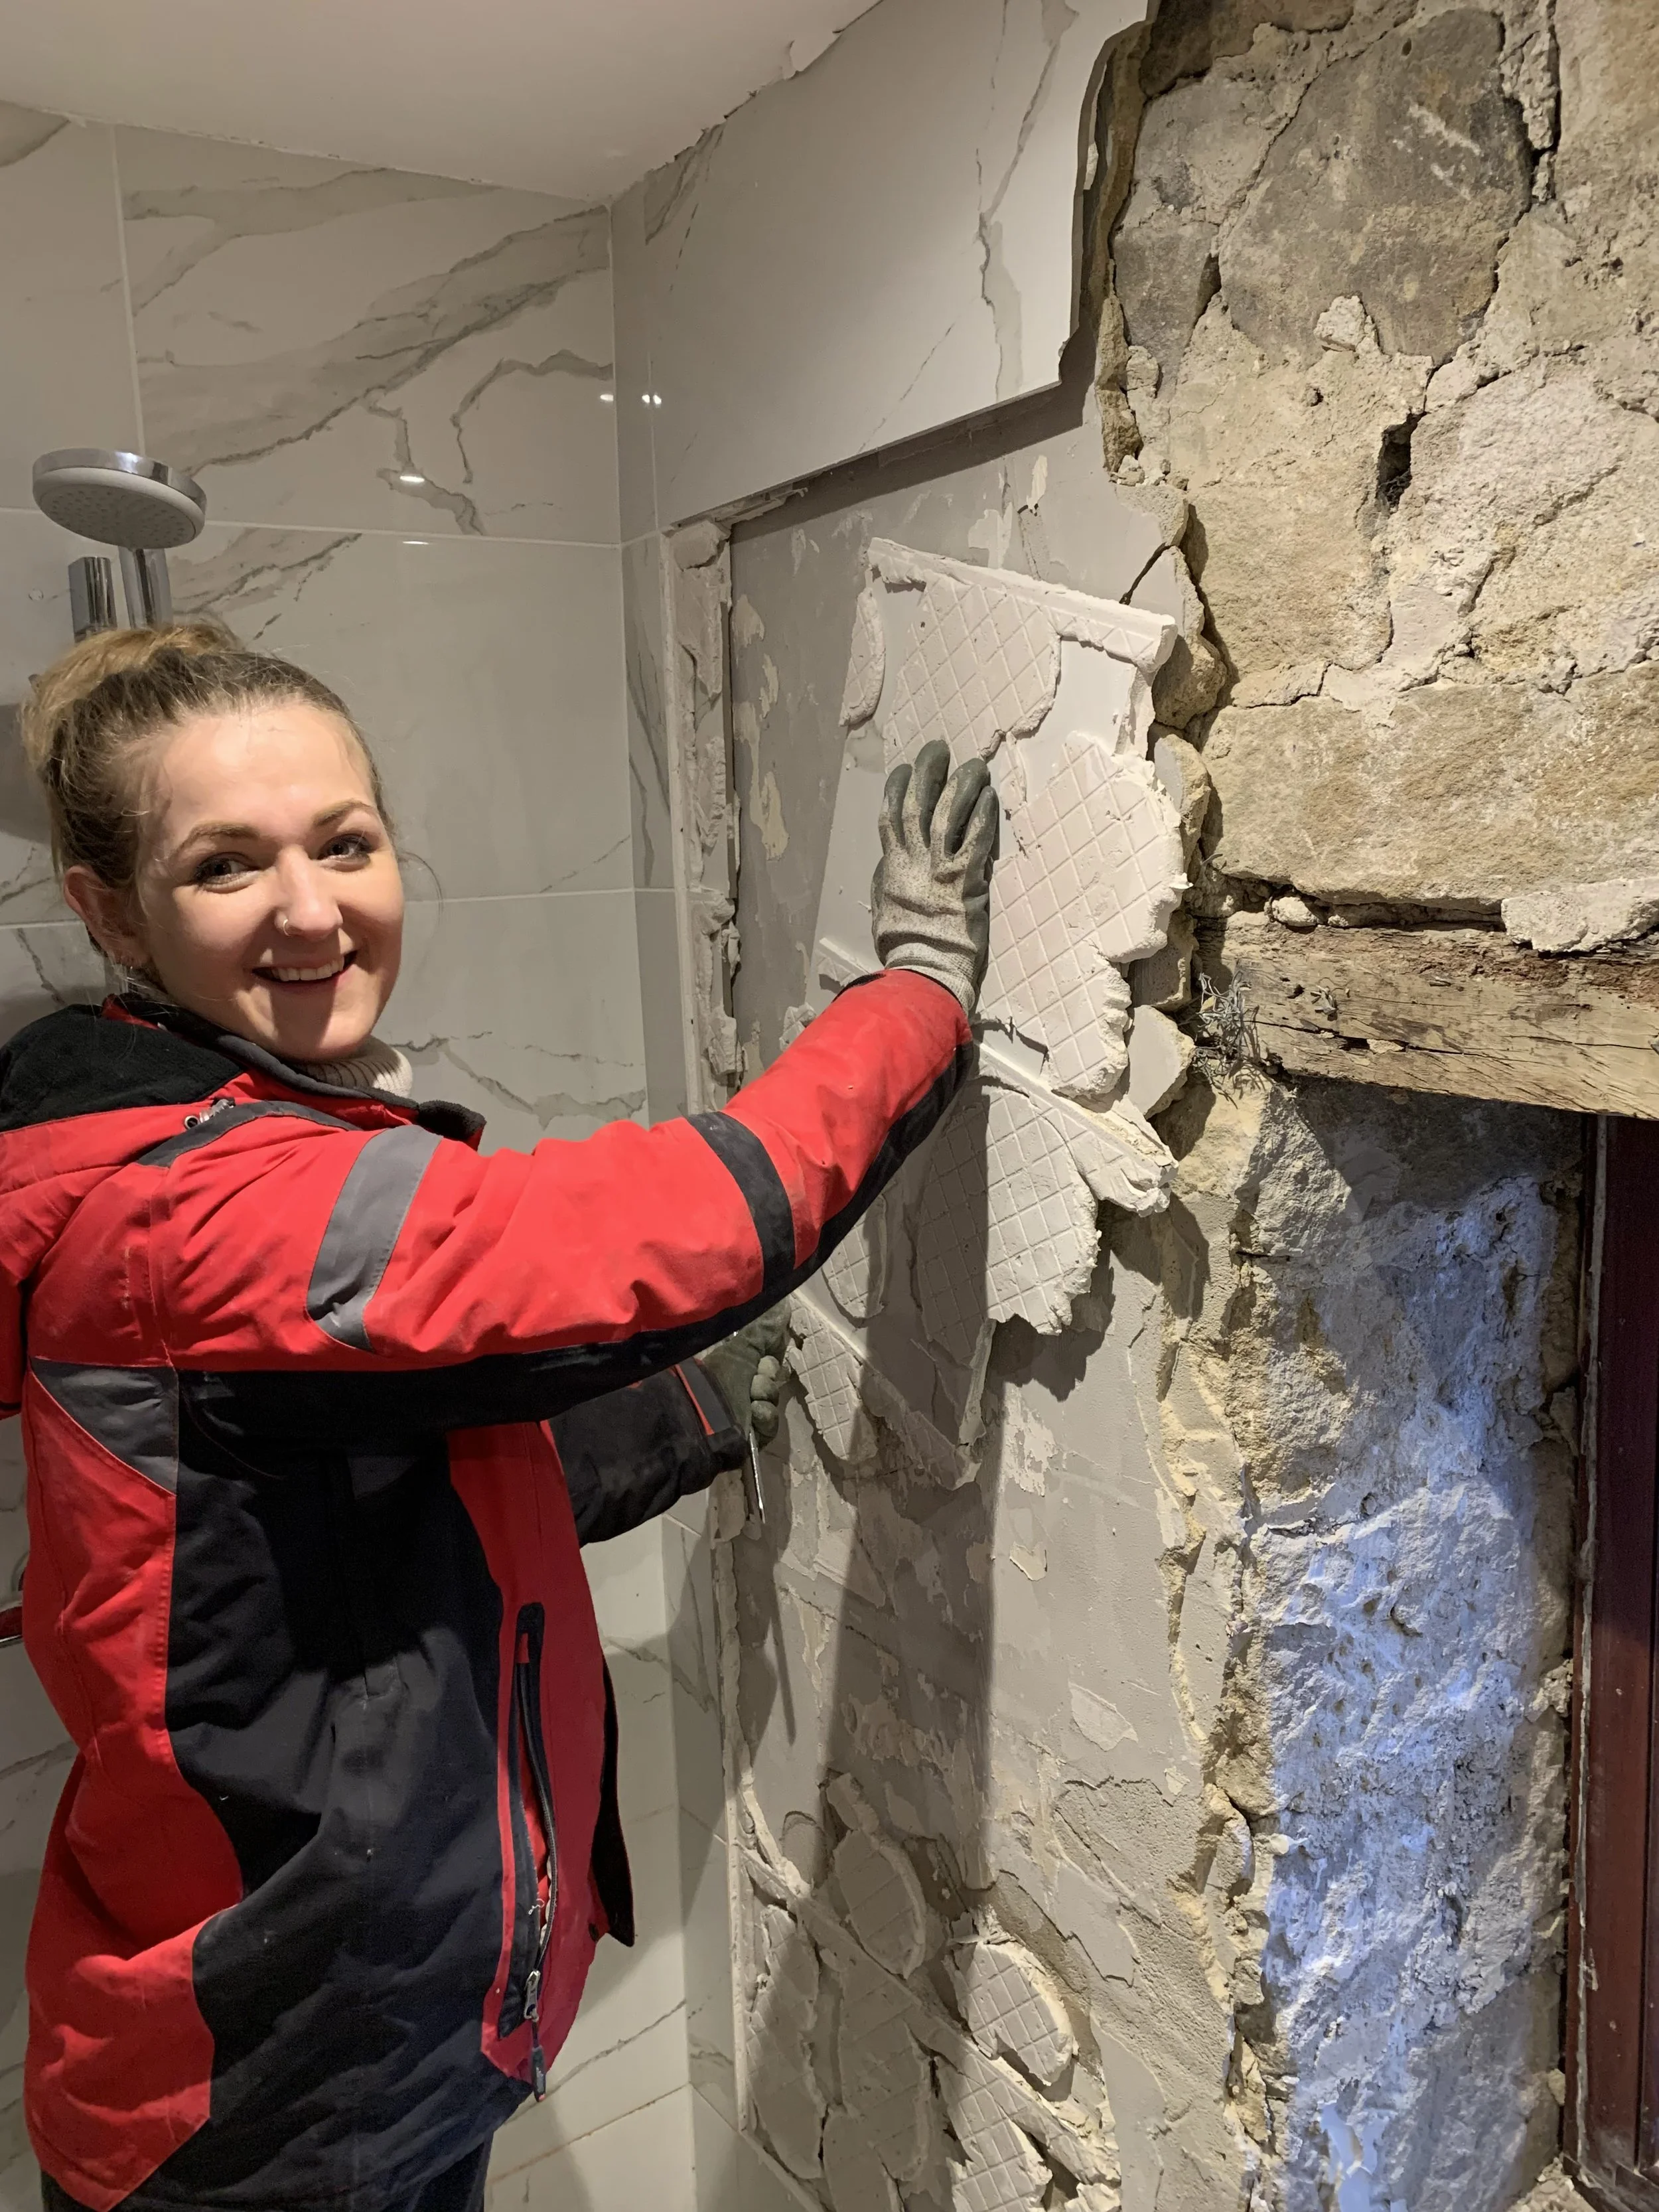
The bathroom has, like every other room in the Cottage, been stripped of its fixtures and taken back to stone. We repointed it in lime, but, unlike the other spaces here, we aren’t going to be plastering the external walls in lime. This is because they will need to be tiled, and as tiles aren’t breathable, there is little benefit in lime plastering. Instead, we have framed out the room and used Thermafleece sheeps wool insulation, which is a breathable insulator. We will be able to use standard gypsum plasterboard and tile backer board over the top of the wool insulation without impairing the breathability of the stone walls, which is a win win for future proofing the Cottage whilst also being a practical solution. Will has replumbed the bathroom after we decided to rejig the layout, which allows for the inclusion of a new bath in the room (more on that here), and we have fitted a few additional spotlights, wall lights and a new extractor fan which will vent outside rather than into the loft space as the original did (and which is definitely not advisable for managing damp!)


With all of this work, it’s important I think to remember that whilst we have been working on these individual spaces in the Cottage, we’ve also been working on the larger project of the Farm as a whole. There, unfortunately, aren’t enough hours in the day for us to show you absolutely everything we’re working on, and honestly it would probably be a little overwhelming if we did! But a few of the jobs we’ve been working on in the background have included repointing the exterior back of the Cottage in lime, relaying and pointing in the patios, discovering overgrown terraces buried under mountains of weeds that needed to be cleared, building the allotment, chicken coops and run, and managing the grounds to name just a few. We’ve also fitted additional woodburning stoves in the Mistal and Farmhouse to see us through the winters, restored 7 secondhand radiators, insulated the lofts, and fitted a temporary kitchen in the Mistal, plus done the general day-to-day jobs that come with running a house of this size and scale with our animals, and alongside our day-jobs.
All in, it really has been quite a year, with an awful lot of progress made and an awful lot of energy put into this lovely place. The biggest change to the Farm as a whole though has been completing phase 1 of our window replacements, which saw 36 rotten windows and 3 doors replaced with beautiful handmade Accoya alternatives, made by James and his team at James Wilding Joinery in Skipton. James and his team will be back in a few months to carry out phase 2, which includes replacing the barn window in the Cottage, but more on that next time! We have loved our first year of renovating the Farm, and I’m excited to see what adventures the next 12 months take us on.


