Plastering Window Reveals


AD. This post contains Affiliate Links, which means that if you choose to buy a product via a link in this post, we will receive a small commission from the purchase.
Over the past month, we have hit some serious milestones in the renovation of the Cottage, and it has all been a bit of a whirlwind! We have finally finished applying the Insulating Render to the external walls of the Cottage, which should improve the U value of those walls by between 50-70% (more on that in my posts on Lime Plastering). Last weekend, we also finished the lime plastering in bedrooms 1 and 2, which leaves us just a few gypsum skims away from having some fully plastered rooms! This has felt like a huge achievement, as with nearly 1.5 tonnes of plaster and mortar applied in the Cottage, there have been times when we felt we would never get past the plastering stage.
One of the biggest technical challenges we faced with lime plastering was how we would finish the window reveals. It took some serious head scratching to work out, but we finally came up with a solution, and a couple of windows down it is working well for us. We thought it might be a helpful post to share if any of you are in the same boat, and are wondering how to finish your reveals too.
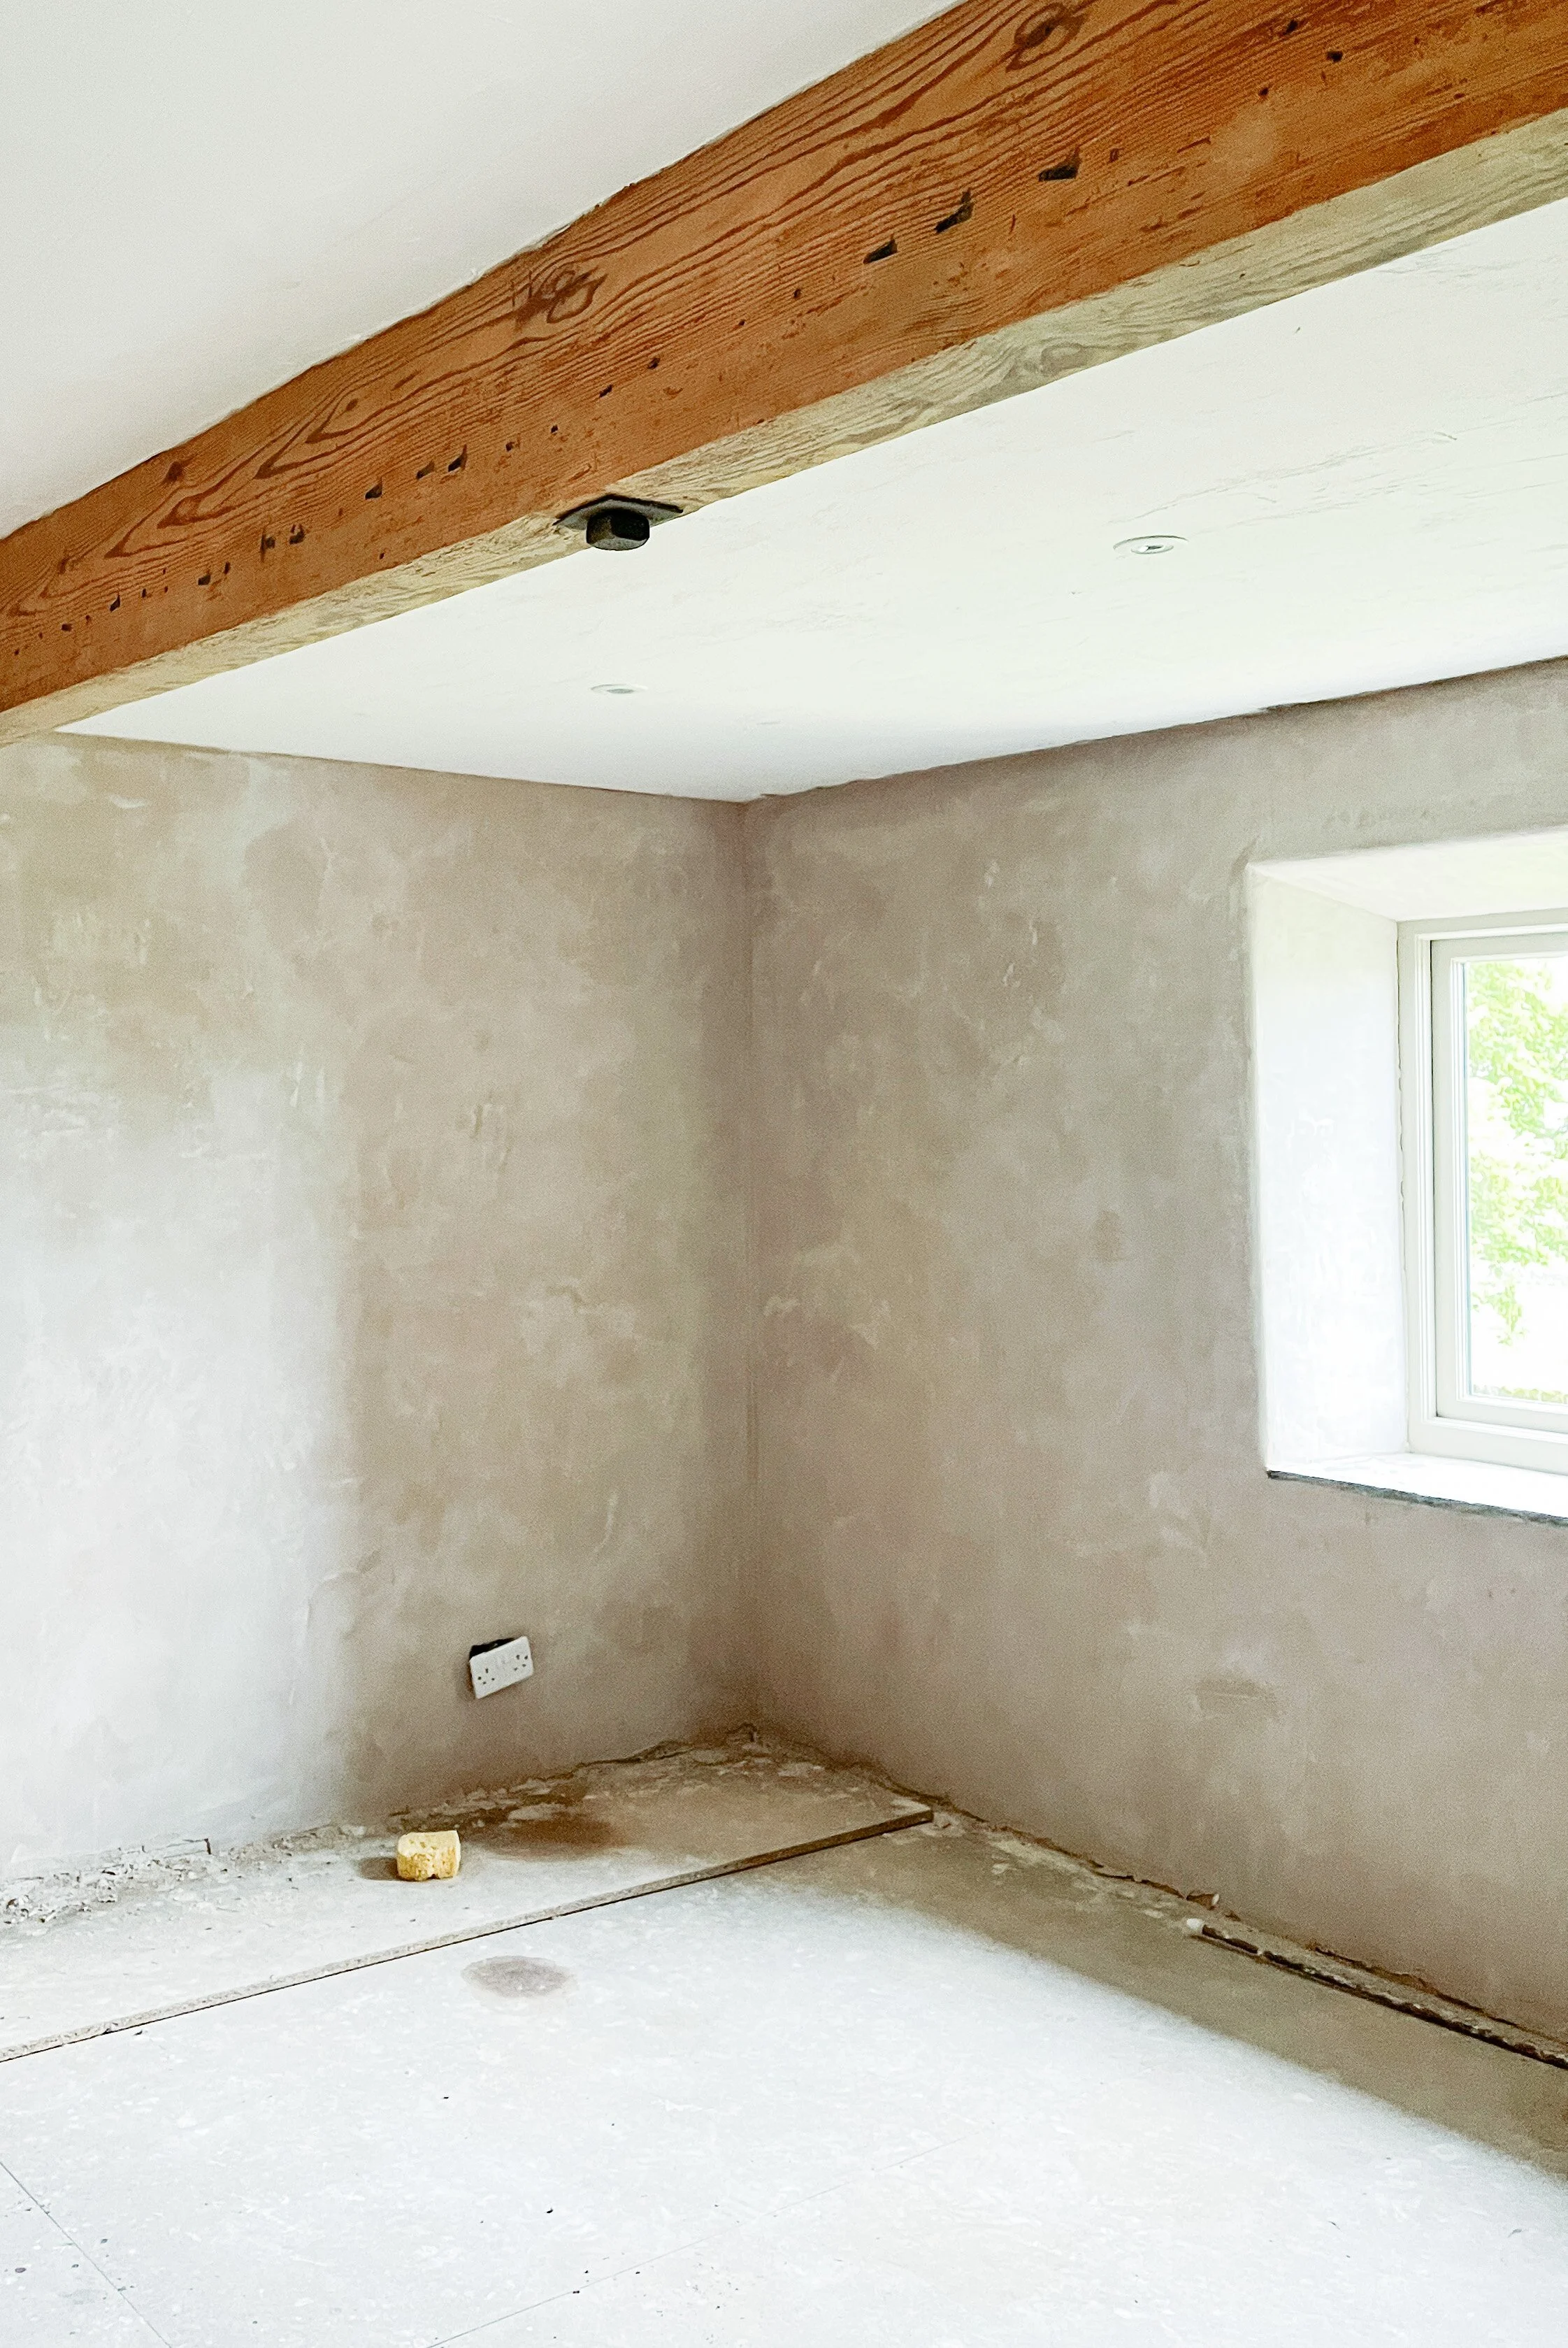
For some context, as the Cottage was originally an agricultural barn, it didn’t have any windows on the second floor. When the barn was converted into the Cottage in the 1980s, openings for windows were knocked through the solid walls, windows fitted, and the reveals boarded with plasterboard. When we started work on the Cottage, one of our main objectives was to remove the non-breathable materials from the external walls, in order to allow the stone to breathe and tackle some of our damp problems. As part of this work, we ripped out the plasterboard, framing, and the plywood sills from the windows, along with the rest of the gypsum and concrete render. On doing this, we found the stonework underneath to be in need of some remedial work.
As you can see from these images, when the openings were knocked out for the windows, the original stone was roughly cut, or knocked out, leaving a messy and uneven edge. Our intention had been to lime plaster directly on to the stone, building up the depth of the plaster in layers to form a relatively straight reveal, but it was clear this wouldn’t be a viable option as the openings were too uneven. So, we repointed the stone with lime mortar, fixed any loose stones in place, cleaned the wall down to prepare it for lime plastering, and put our thinking caps on.
After a bit of working out, and lots of research, we found a solution that involved using beading to frame a reveal. I’ll run through it step by step, but please forgive the quality of some of the images in this post, I hadn’t planned on writing this post, so some of them are screenshots from videos! There is also a full highlight of the process on my Instagram page, so if you’re more of a visual learner and fancy having a watch, that’s there for you too.
1) Making the beading
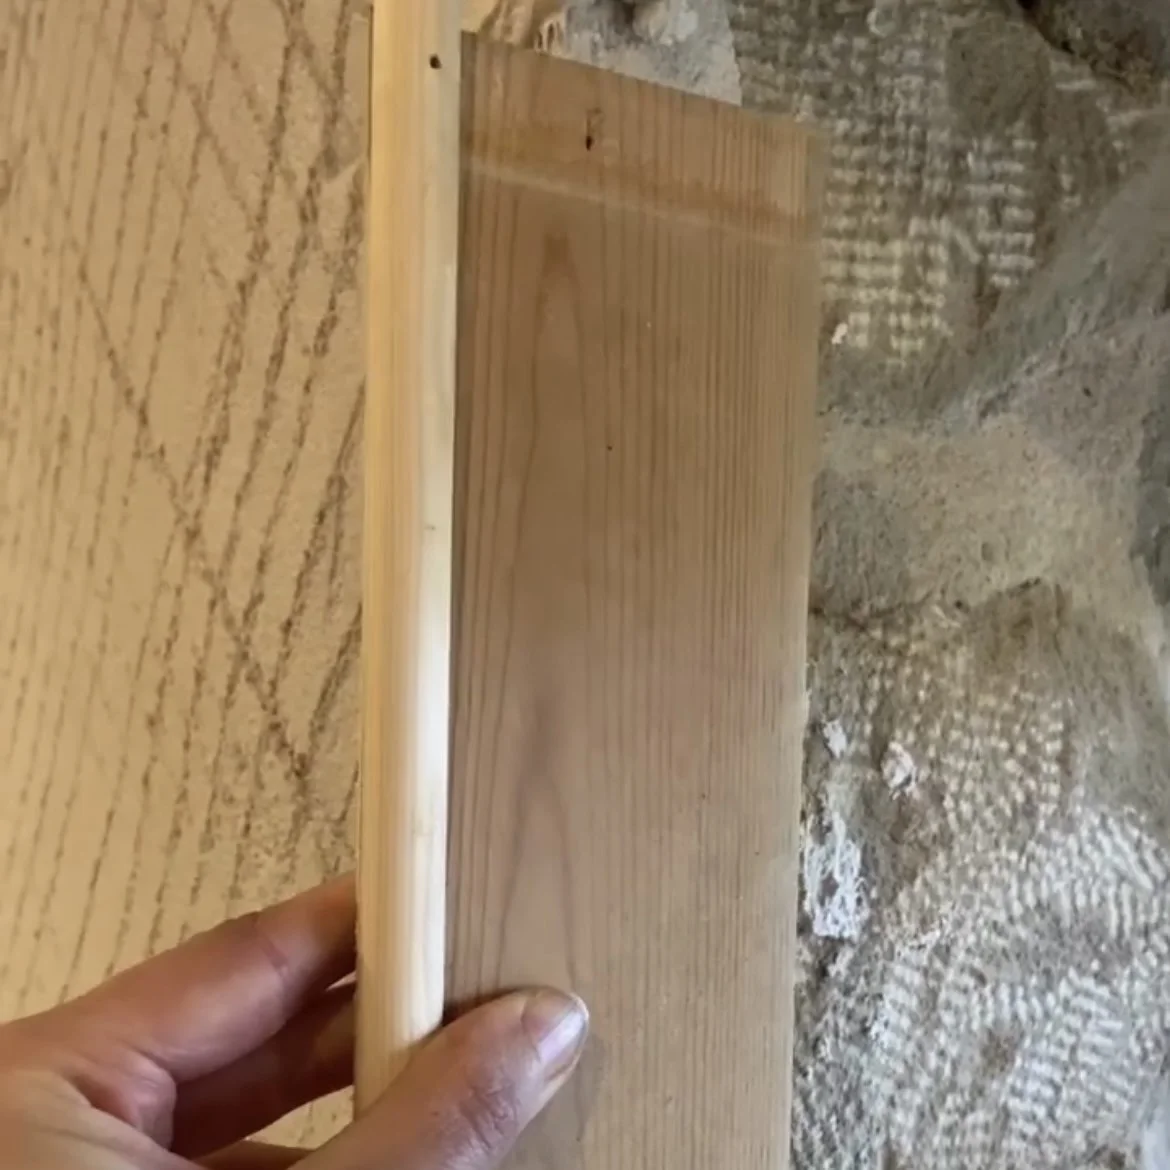
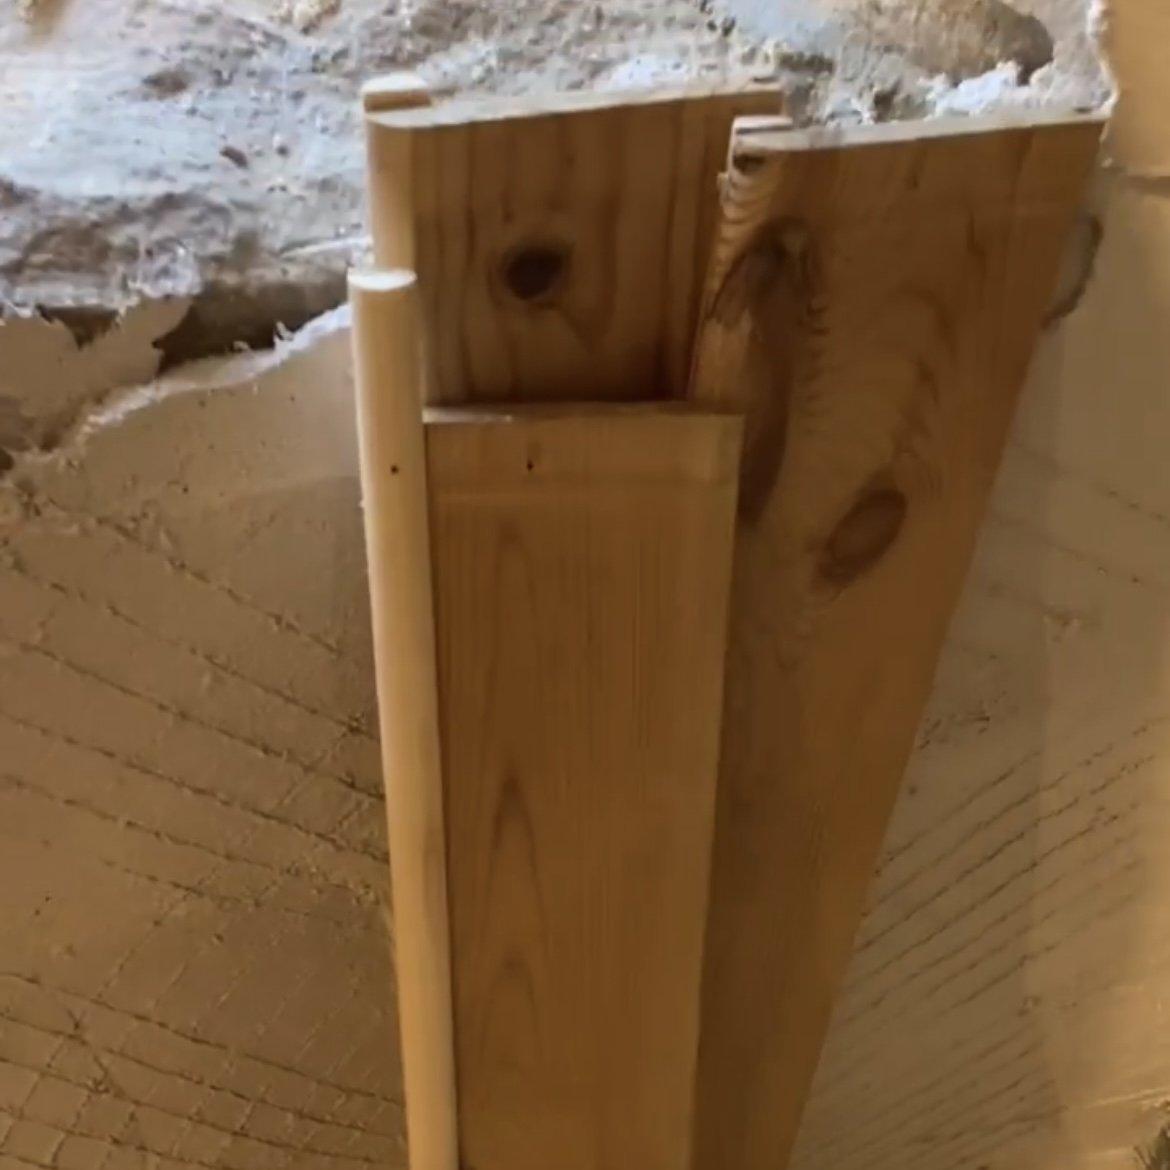
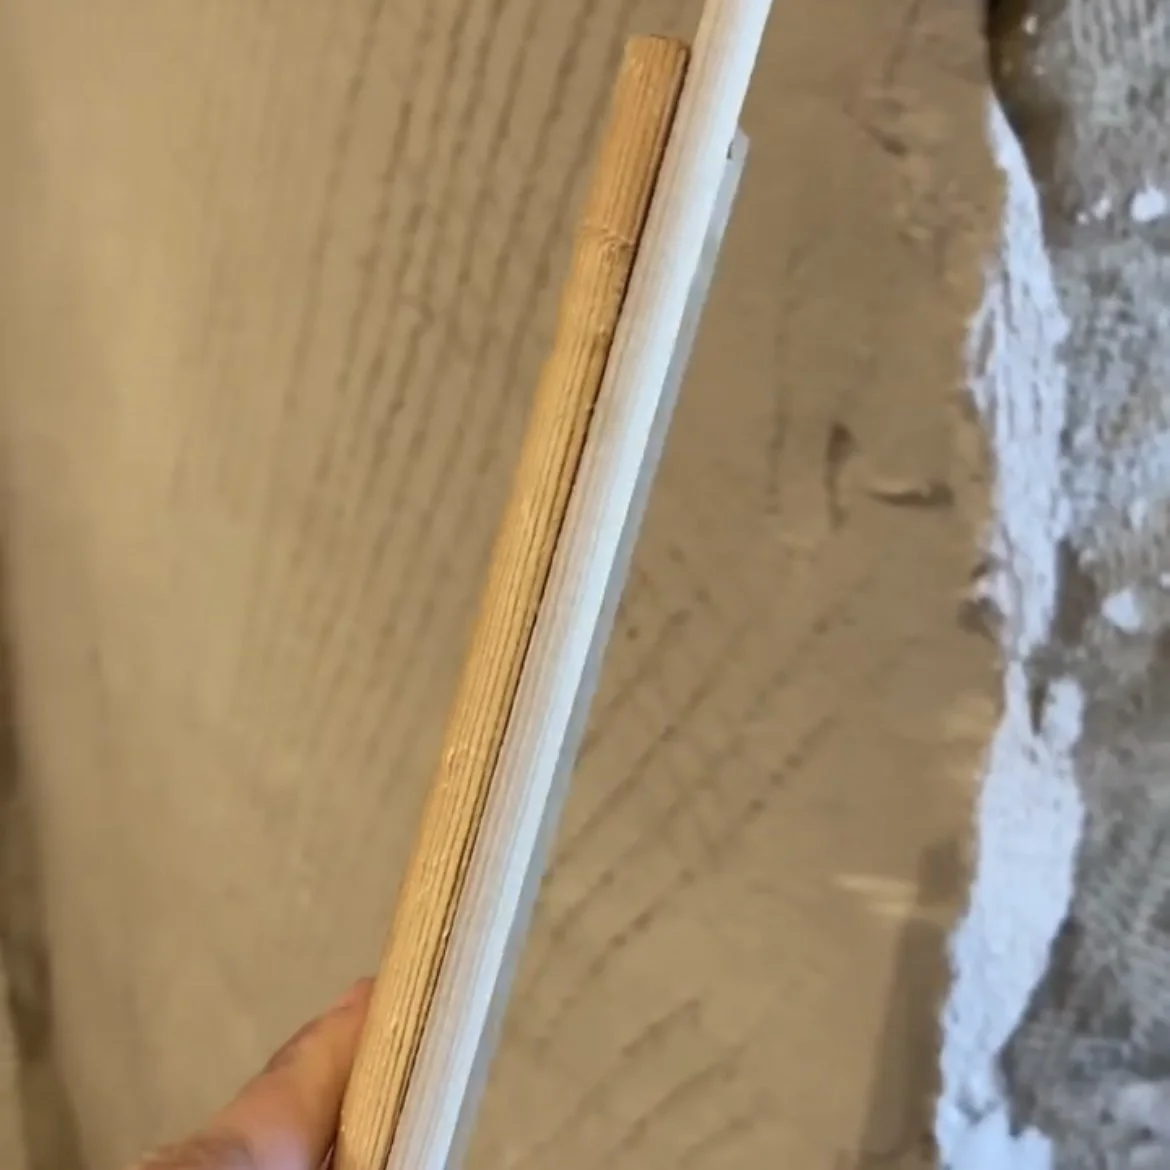
First off, Will made some beading using scrap wood, and half dowel. To do this, he routed off the edge of a piece of timber scrap at 45 degrees to create a rounded corner. We then added some pine half dowel moulding to the routed wood, glued it in place using Gorilla wood glue, and tapped in some steel pins to hold it in place whilst the glue set, and then removed the pins. The formed a ‘semi circle’ curve at the end of the beading.
The idea behind the beading was three fold. Firstly it provided us with a straight edge to plaster up to on the larger areas of wall around the windows. Secondly the curved edge would provide a ‘template’ we could follow, to create curved reveals. Having the template of the dowel/routed edge meant that all of the curves on all of the reveals would be uniform, whereas doing them by eye would be harder to make consistent. Thirdly, the curve of the half dowel would provide an edge for us to board onto, to finish the reveals flush.
2) Fixing the beading
Once the glue on the beading had dried and the pins removed, it was time to fix the beading to the frame. As the masonry around the reveals was so uneven, we decided to use timber blocks to square off the reveals, before attatching the new beading. We used a spirit level as a guide to make sure we were working straight, and screwed timber blocks made from scrap studwork into the masonry by drilling pilot holes, measuring and cutting the size of the block needed, and fixing them in place with masonry screws. It’s important when working with lime to use stainless steel screws, as lime is alkaline and will corrode normal screws.
Once the blocks were level and in place, we cut the beading to the size of the reveal, and screwed it into the block with the flat timber against the blocks, and the leading edge with the dowel attached facing into the window. Because the masonry of the reveals was so uneven, there were large gaps down the sides of the beading. Obviously we couldn’t plaster over this, as the voids were too big and the plaster would have just fallen through, so we decided to use stainless steel reinforcing mesh to support the plaster. Reinforcing mesh is commonly used in brickwork to add support, but is a pretty versatile thing! As we had already applied the float coat of lime plaster to the walls, and used some of it to fill the hollows in the reveals to help improve the airtightness, we were able to use stainless steel staples to pin the reinforcing mesh in place. If we hadn’t already applied a coat of plaster, we would have used masonry screws to fix, or pinned into the mortar lines with stainless steel nails.
Stapling the mesh didn’t give the firmest hold, but the mesh only needed to be held in place until we could apply the float coat of plaster, which would then support the mesh once the lime had carbonised and hardened. We applied the float coat of Insulating Render, flush to the edge of the beading, and allowed it to go off, which secured the mesh in position.
3) Fitting stone sills
Next up it was time to cut and fit our stone windowsills. We had the windows in the Cottage replaced just prior to this, which is why the photos look a little different from this point - gone are those rotten 1980s windowframes! This was a relatively straightforward process, in which we sourced reclaimed Yorkshire stone from a local masonry salvage yard. Because we were working with reclaimed stone, we tried to pick flags with a relatively level surface and a nice ‘leading edge’ - the leading edge would be the edge facing into the room, so would be the only edge visible. Having three cut edges wasn’t a problem, as the cut edges would sit against the windowframe and against the two sides of the reveal, so would be hidden with plaster and not seen.
We measured the size we’d need the sills to sit at, bought stone slightly larger than we needed, and the owner of the yard very kindly cut the stone to size for us using a Stihl saw. We could have cut the stone ourselves with an angle grinder and a couple of decent blades, but this would have been hard work compared with the Stihl, which went through the old stone like butter! It cost us £300 to buy enough stone for 8 reveals, and have them cut down to size. Once the stone was cut, we gave the newly made sills a clean using the Pink Stuff, which is a fantastic natural cleaning paste made predominantly from bicarbonate of soda. I have no idea how it works, but it seems to be able to clean just about anything, stone flags that are a few hundred years old included! We applied the Pink Stuff (yes, that is it’s name) with a scrubbing brush, gave the stone a good scrub, rinsed and powerwashed the sills to finish them, and left them to dry.
Once dry, we bedded the sills into position. We used cement for this, because the lintels of the windows in the Cottage are concrete not stone, but ideally you would want to do this with lime if you can (particularly if your lintels were stone or brick). We let the mortar set, and voila, a stone windowsill!
4) Adding the board
Once we had the stone sills in place, and the work on the beading done, it was time to add the boards. Where previously there had been plasterboard, we decided to use Celenit render carrier board from Cornish Lime. Render carried board is a lightweight breathable board and insulator, and is highly vapour permeable. It’s designed for use alongside lime plaster, so was the perfect choice for our reveals. Before we could apply the board, we dubbed out any hollows and made sure we had a relatively level and sound surface.
“Celenit boards offer a strong and effective alternative to cement board, plasterboard, rib and expanded metal lath.”
Celenit boards have an open texture, which provides a key for lime plaster or lime render to be applied directly to the board. There’s no need to use a primer (i.e. PVA primer is used with gypsum plasterboard to prepare the surface for plastering), which maintains the breathability of the board. The board is made from wood fibres, which is treated to be rot and fire resistant. We used the board in a 15mm thickness, and built a basic timber frame within the reveals to support the board. With the frame in place, we cut the board to size and butted it up to the half dowel on the beading we made earlier, which was fixed in place using stainless steel screws and plastic washers, ready to plaster.
5) Building the curves
Once the boards were in place, we were ready to prepare for skimming. Most of the prep work for this was already done, but we had some filling we needed to do, particularly at the joints where the Celenit board met the half dowel of the beading. Because we wanted to minimise the possibility of any cracking at the joints in the boards and the joints between board, beading and plaster, we decided to use some Insulating Render to fill the gaps and scrim tape over this to distribute the weight of the plaster.
The method of doing this was really just simple filling and plastering. I used a plasterers trowel to apply the render to the gaps, and then pressed scrim tape into this initial fill. It would be best to use an alkaline resistant mesh, such as the one Cornish Lime supply, but in this instance we used what we had readily available. With the scrim tape in place, I applied a second coat of Insulating Render, and used a combination of plasterers trowel, scrapers, and filling knives to shape the plaster into a suitable curve, ready to skim over.
6) Skimming
The final step to plastering the reveals! We skimmed the entire walls and the reveals at once, using a 2:3 lime putty:sand plaster (Cornish Lime’s CLM 66). By skimming the entire wall in one go, we could limit any join lines in the plaster, creating a seamless finish. We scrim taped the joints and corners of the Celenit board as we went, to prevent cracking, and followed the plaster round the curved edges of the reveals we built up using the Insulating Render to give a really smart curved edge to the reveals.
We still have some finishing off to do, and once the lime skim has dried a little more we will be able to point in between the stone windowsill and the new window using lime mortar. We will also need to seal the edges around the new window where the lime plaster meets the frame, but we’ve not quite decided what to do with that yet so we will keep you updated! Next up, a few more weeks of gypsum skimming ahead, and allowing the lime plaster time to cure, and then we’ll be on with fitting skirting boards and painting in no time.
I hope this post has been helpful, and as ever if you have any questions, pop them in the comments below!