How to Restore Wooden Beams
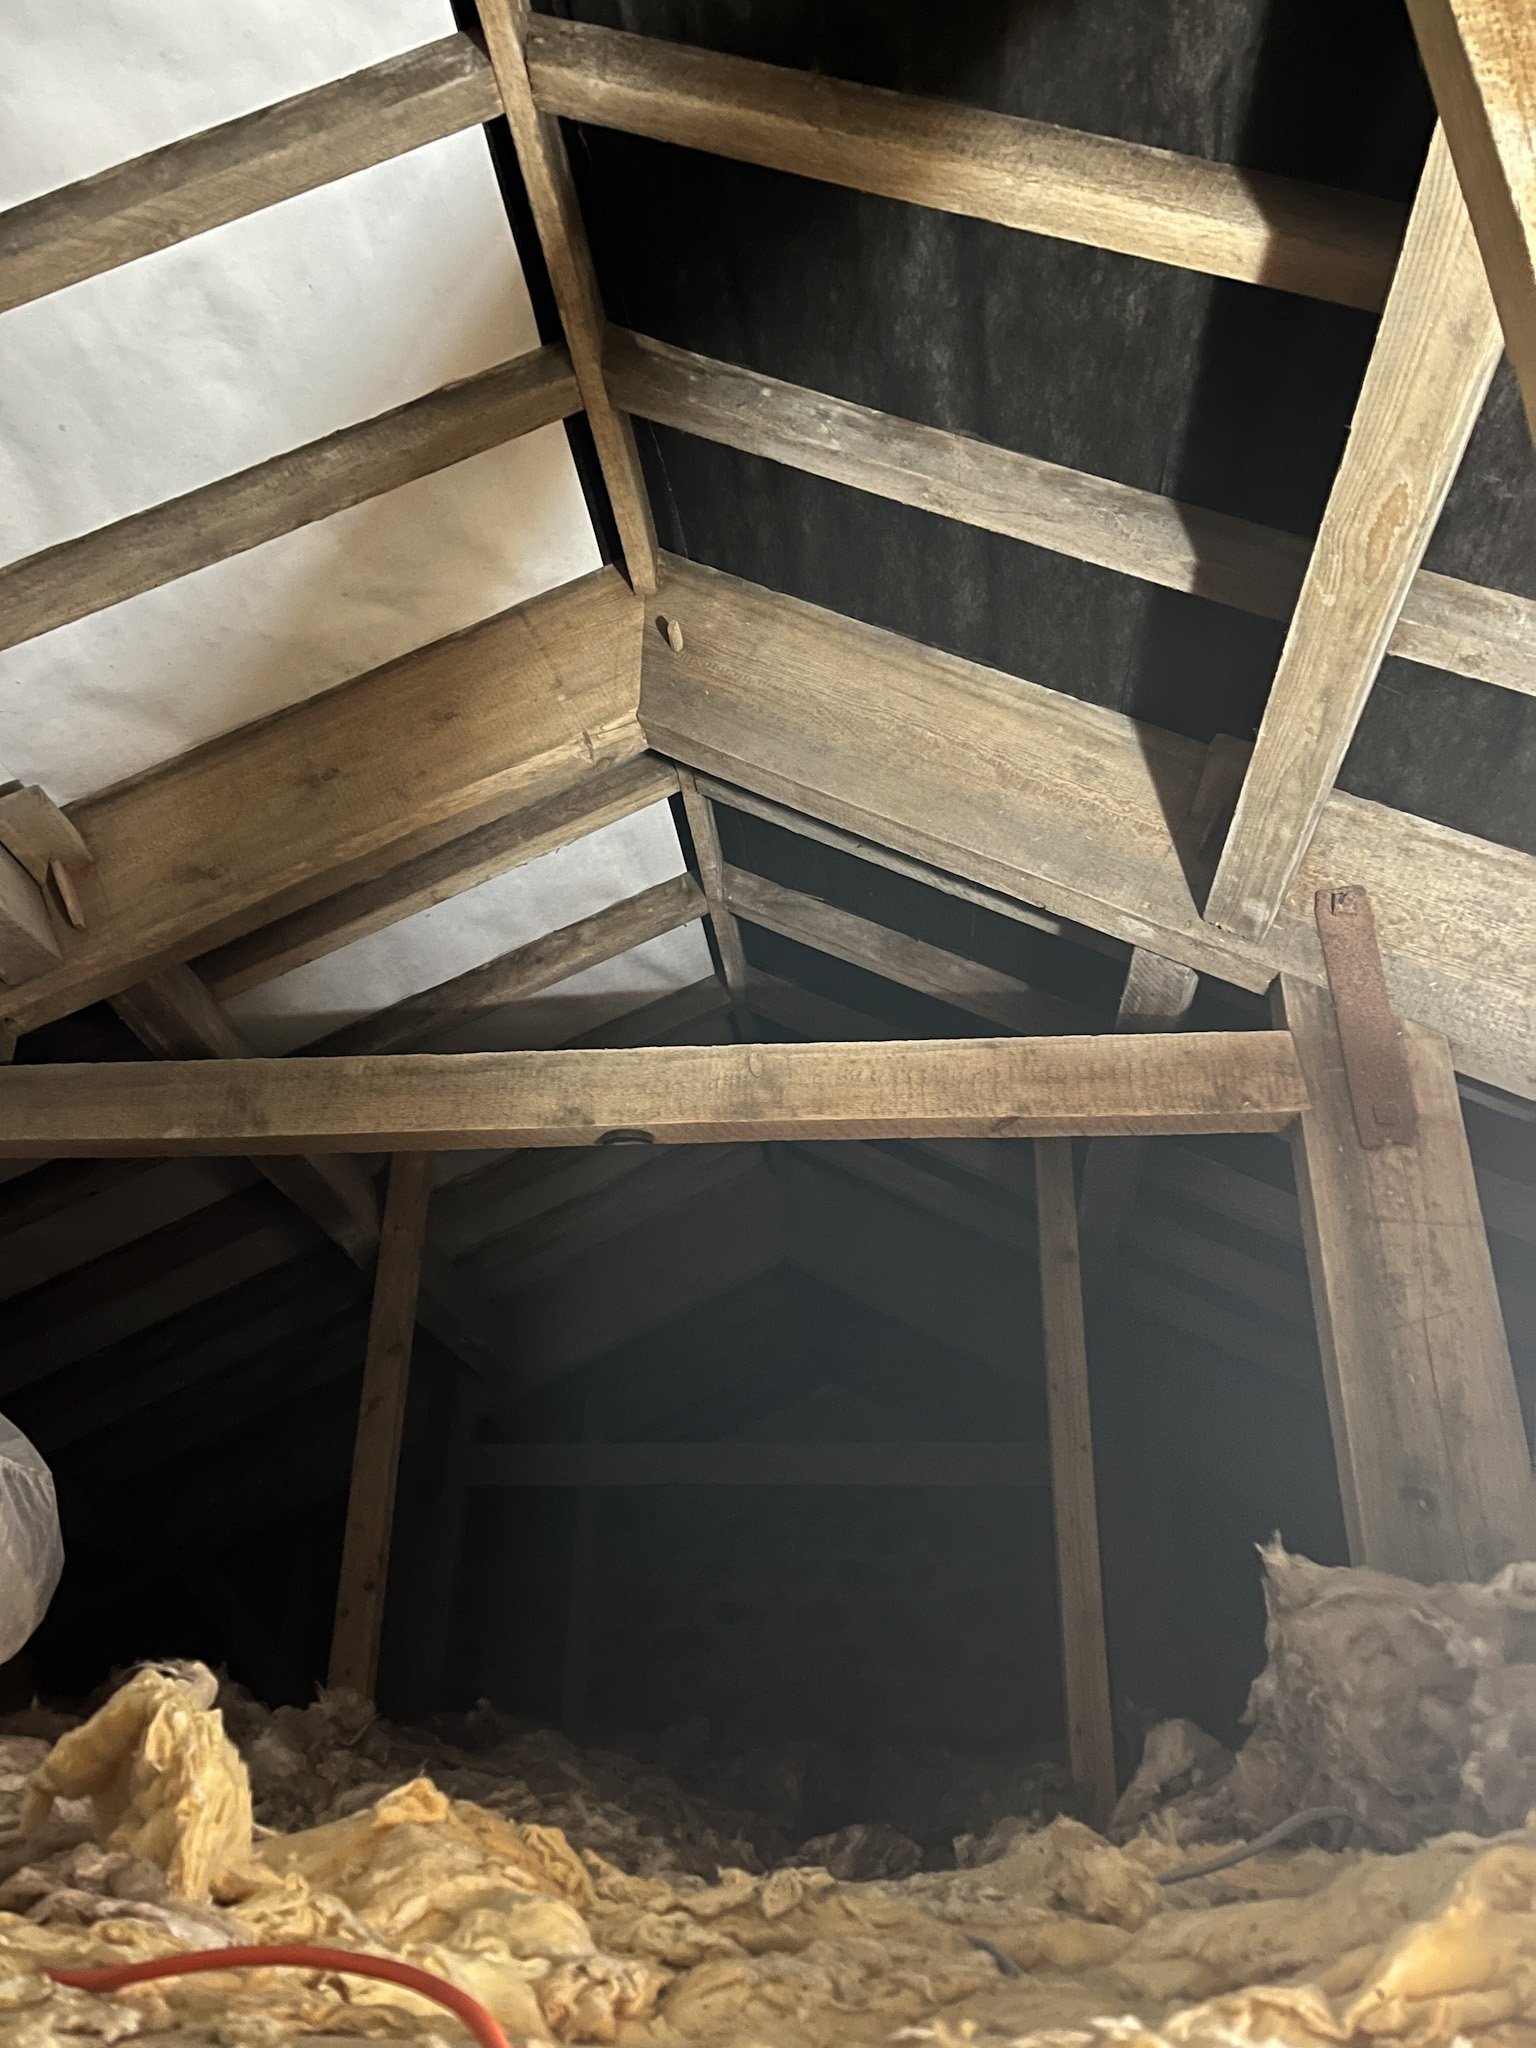
Original pine ‘H’ beams in the loft of the Cottage, also known as Queen Post Trusses
AD. This post contains Affiliate Links, which means that if you choose to buy a product via a link in this post, we will receive a small commission from the purchase, and references to products received as part of a collaboration on Instagram.
When we were scouring the property market for the Farm, the one very explicit requirement I had was that I did not want to buy a property with beams. I didn’t like them, I didn’t want them in my house, and I definitely didn’t want the job of restoring them! Fast forward to finding the Farm, and you’ll have noticed the houses we now call home are riddled with the blooming things. I’m not sure why I disliked them so much, but I think it was probably subconsciously something to do with being brought up in Victorian homes, with a real love of Georgian architecture and all of its precise symmetry. The informality of beams, with their propensity to run at funny angles, and to twist and split as old wood does, meant that whilst I could appreciate their beauty in other settings, the idea of living with them was a firm ‘no’ from me! Funny how these small details get us so worked up, isn’t it? But, a year and a bit later, as a previous lover of a straight-laced, serene Georgian homes, I’ll admit I now find the sight of these old lengths of timber pretty inviting.
I have spoken before about the Cottage’s previous life, as a barn and hayloft for the main Farmhouse, when it would have provided storage for crops and animal feed in the roof, and the lower level would have been taken up with animals and machinery. When this was converted into a holiday let in the 1980s, the few original features that a utilitarian stone built barn would have sported were removed, concreted over, or hidden due to damage. When we began work on the Cottage in June 2021, it could have almost as easily passed for a new build home as a historic building. The original beams at the ground floor level had been removed and replaced with new timbers as the ceilings were lowered to make an additional floor as opposed to a hayloft. As someone who loves an original feature in any guise, this left the place feeling to me somewhat soul-less.
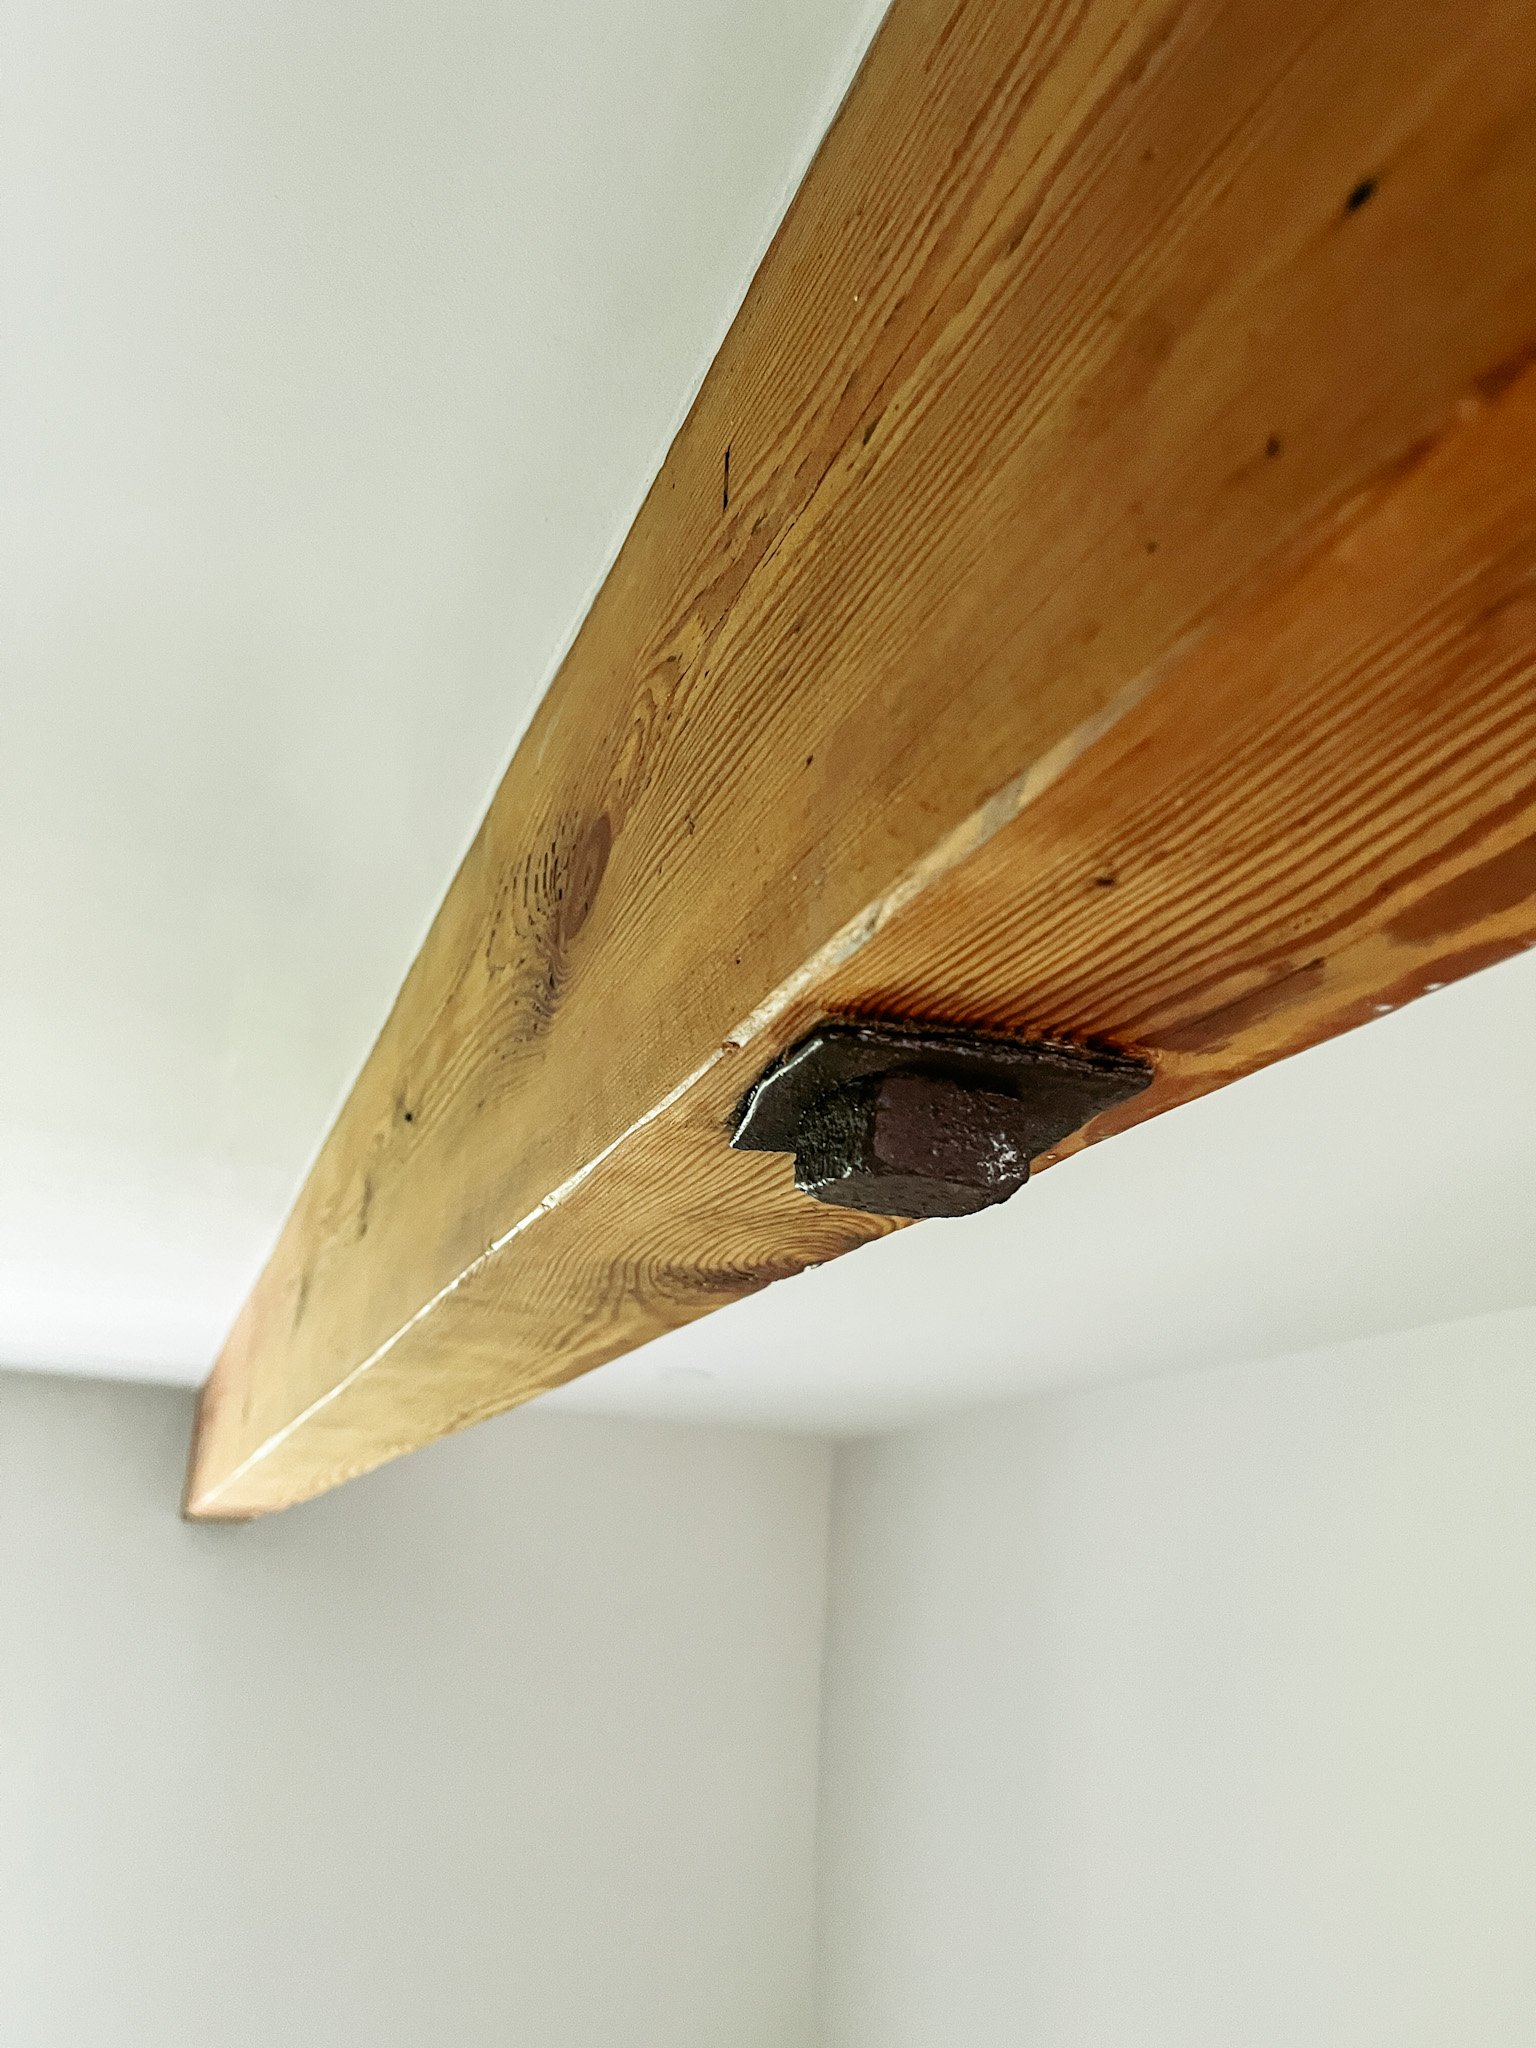
All wasn’t lost though, and we realised we still had the original beams upstairs (thank goodness). The loft spaces at the Farm house some incredible H framed pine timbers, also known as Queen Post Trusses, which support the roof structure. Because of the low ceiling height in the Cottage, these timbers protrude into the ceilings of the first floor below. The beams here run the full length of the house, from bedroom 1 across the mezzanine to the double height wall in the foyer area, and from bedroom 2 right through to the bathroom.
We found the beam in the bathroom to be in particularly bad shape. It had been covered over with plasterboard, which was nailed directly to the wood. I assume that this was done in an effort to protect the beam from damp as it was housed within the bathroom, which at the time had very little ventilation, but unfortunately this did more harm than good. As with stone, timber is a material that needs to breathe - allowing moisture to pass in and out of it from the surrounding environment as needed. By effectively ‘wrapping’ the beam in plasterboard, it was sweating inside its gypsum jumper thanks to moisture that had penetrated through small cracks at the seams of the board, causing the beam to quietly rot away behind its covering. We knew that we wanted to restore these beams as best we could, not just for their aesthetic benefits - adding character to the rooms and giving a nod to the history of the building - but also for purely selfish reasons.
If the beams continued to rot behind layers of plasterboard and varnish, it would inevitably eventually lead to them failing and needing to be replaced.
Rot wasn’t the only element we were contending with, as every piece of timber in the Cottage displays signs of woodworm. This isn’t exactly surprising in a building that is almost 140 years old, and neither is it cause for panic, but it is something we needed to address. It’s taken us a few months to get to the point where we have fully restored some of the beams, but with the bedrooms now painted (and looking gorgeous), we finally have some finished results we can show you along with the process of how we restored our beams, and some thoughts on how we’d approach this restoration in different setting. So, if you too have found yourself with a property full of beams and are wondering what to do with them, I hope this guide may prove useful to you!
Stripping back the wood

Starting to sand back the varnish on the Mezzanine beam
The first step in restoring anything, really, is to consider what it is that you’re dealing with, and the condition it’s currently in. For out beams, we had a bit of a range:
The beams in the bedrooms and over the mezzanine were pine, and had been previously painted in an orangey-varnish. Whilst the colour of the varnish wasn’t what we would choose, the wood itself was in fairly good condition.
The beam in the bathroom was also pine, but had been wrapped in plasterboard causing wet rot, and mushrooms were growing on the wood. As the beam was covered, the timber wasn’t varnished, and was just raw wood. This beam displayed the most signs of woodworm, which thrive in damp environments.
Over the barn window, and smaller window on the staircase, there are two oak beams. Both of these had been stained very dark brown, and then varnished over the top.
We tried a few methods of stripping back the wood, and found that for the Pine beams, sanding was the best option. As these beams are dressed with relatively square sides and edges, we could easily use an orbital sander without removing too much material. However, if you have beams that are more friable (soft) and damaged, I’d caution against sanding as this might be too harsh on your wood. If that sounds like your beams, or if you don’t have any nasty old paint or varnish to remove, I’d suggest skipping ahead a little to the paragraph on ‘cleaning down’. I sanded our pine beams with several passes, working up the grits of paper from 60 (coarse), 80 (medium) to 120 (fine), which allowed me to reach a relatively smooth surface and remove all of the old varnish.

Chemical stripper applied to the Oak beam
The oak beams over the barn window and staircase window required a different approach. These beams had been stained, and because they aren’t shaped, squared beams so much as just a tree trunk full of knots and twists in the wood, sanding wouldn’t have been an effective way of stripping the old finish. Plus, oak is an incredibly hard wood, particularly 140 year old oak, which make it very difficult to sand anyway (trust me, I tried). So, for these beams, I put away my sander and instead opted for a chemical stripper. I used Bartoline TX10 Paint Stripper, which is one I’ve used for lots of projects over the years and I find to be pretty effective. I applied a coat of the stripper, allowed it to sit for an hour, and then applied a second coat over the top of the first. An hour or so later, I scrubbed the beam with a soft wire brush (a coarse scrubbing brush would work fine too), and removed as much of the stripper as possible before going over it with fine wire wool, which does a great job of catching any excess. I repeated this process a couple of times, and it did a good job of removing the majority of the old stain, varnish, and general gunk from the wood.
It’s worth bearing in mind with beams that you’re not really looking for them to be perfect. There are natural imperfections in the wood that will have appeared over time, and these tend to look best when they are celebrated by good restoration, not hidden or disguised.
Cleaning down
If sanding was too harsh for your beams, or if you didn’t have any old paint or varnish to strip from the beams, you might want to start here. After I had sanded the pine beams, I gave them a good scrub with diluted sugar soap to clean off any dirt or debris, and allowed them to dry naturally. If your beams are particularly grubby, you might want to repeat this process a couple of times before moving on to the next step. Ideally, your water should run clear when the beams are fully cleaned. If you used chemical strippers, you will also want to neutralise the wood before you sugar soap. To do this, I sprayed the oak beams that had been chemically stripped with dilute white vinegar, and allowed that to dry before giving them a wash with sugar soap to remove any residue. Your house will smell like a good old fashioned Fish’n’Chip shop for a day or so after you’ve done that, but it’s a process worth doing to neutralise the alkaline of the stripper.

The Oak beam, after bleaching
Lightening
Now this step won’t be for everyone, but it’s something I did on the Oak beams above the barn window and smaller window. These beams had been stained very dark, and even after a couple of passes with paint stripper, some of the colouring remained deeply engrained. So, I decided to bleach these beams. There’s a lot of tutorials around for this (including some brave souls that use oven cleaner as a wood bleacher - apparently it’s very effective but I would proceed with caution there!). I used standard thick household bleach. You could water this down and spray it on if that is easier for you, but because I didn’t want to get excess bleach on anything, I decided to paint it on. Like with the paint stripper, I painted on the bleach, and left it to sit for an hour, before scrubbing the beam and rinsing it off. I found this didn’t really make much difference, so I reapplied the bleach and this time left it overnight before cleaning off. This was much more effective, and did a great job of lightening the stubborn areas of stain.
Cue more scrubbing the next day to remove the bleach, which left me with a bucket of particularly filthy water at the end (turns out I hadn’t done as good of a job at cleaning them as I had thought!) and it took a couple of rinses to get the water somewhat clear. Once I had done scrubbing, I again sprayed the beam with a dilute mix of 1 part water to 1 part white vinegar, to neutralise the bleach, and gave the beam another sugar soap once that had dried to be safe.
Treating for woodworm
With the beams sanded, chemically stripped, lightened and goodness knows what else, I then needed to treat them for woodworm. There are clear signs of woodworm in all of the timbers at the Farm - those telltale tiny holes where those uninvited guests have made their homes - but from our survey we know that the woodworm is historic and inactive. However, better safe than sorry, and so I decided to treat all of the timbers with a woodworm treatment. The easiest way to do this was to decant some woodworm fluid into a spray bottle, and spray this directly onto the beams. I use Lignum Woodworm Killer, which is a waterbased treatment, so it’s not as smelly as some of the solvent based treatments. I gave each beam a spray all over, ensuring every surface was covered, and allowed this to dry before reapplying the following day.
Applying the first coat of Osmo oil to the stripped beam in the Bathroom
Finishing
With all the prep finally done, I could move onto finishing the beams. Some people choose to leave their timber raw and untreated, which is absolutely fine and a lovely way to treat your wood if that’s the right option for you. However, in the Cottage I was concerned about things like watermarking as we have lime plastered walls, and one of the beams is in the bathroom, and also that the pine beams that they might ‘orange’ if left unfinished. So for that reason, I knew I wanted to coat the beams to finish.
I didn’t want to have an obvious finish, and wanted to maintain the breathability of the timber, so having just spent hours stripping old varnish and stain, there was no way I was going to restrain or varnish them. From my research I decided that waxing or oiling would be better in this case. Beeswax gives a lovely finish, but doesn’t offer much protection from watermarking, so I felt that wasn’t the right option for me, and so that left me with oiling. I have used Osmo Oil many times over the last few years on various furniture projects, so dropped the team a line to see if they thought it would be suitable for use on our beams, and after a bit of back and forth they provided me with some samples of different finishes so I could try them out.
Osmo oil is a hardwax oil made of a blend of natural oils and waxes that provides a hardwearing protective finish to wood. It’s scratch and scuff resistant, protects against watermarking, and doesn’t crack, flake, peel or blister… perfect for a job I really don’t want to have to do twice! The Osmo range includes clear and pigmented finishes, and I decided to test these out on some scrap pine and oak we had in our wood store. I loved the finish of Raw 3044 and White 3040, which contain varying levels of white pigment to neutralise orange undertones (perfect for pine). However, when I tested these on a piece of knotty timber, I noticed the white pigments had a tendency to ‘puddle’ in the uneven areas of wood, such as woodworm holes, which gave a slightly patchy finish. So, after some experimentation, I settled instead on Clear Matt 3062.
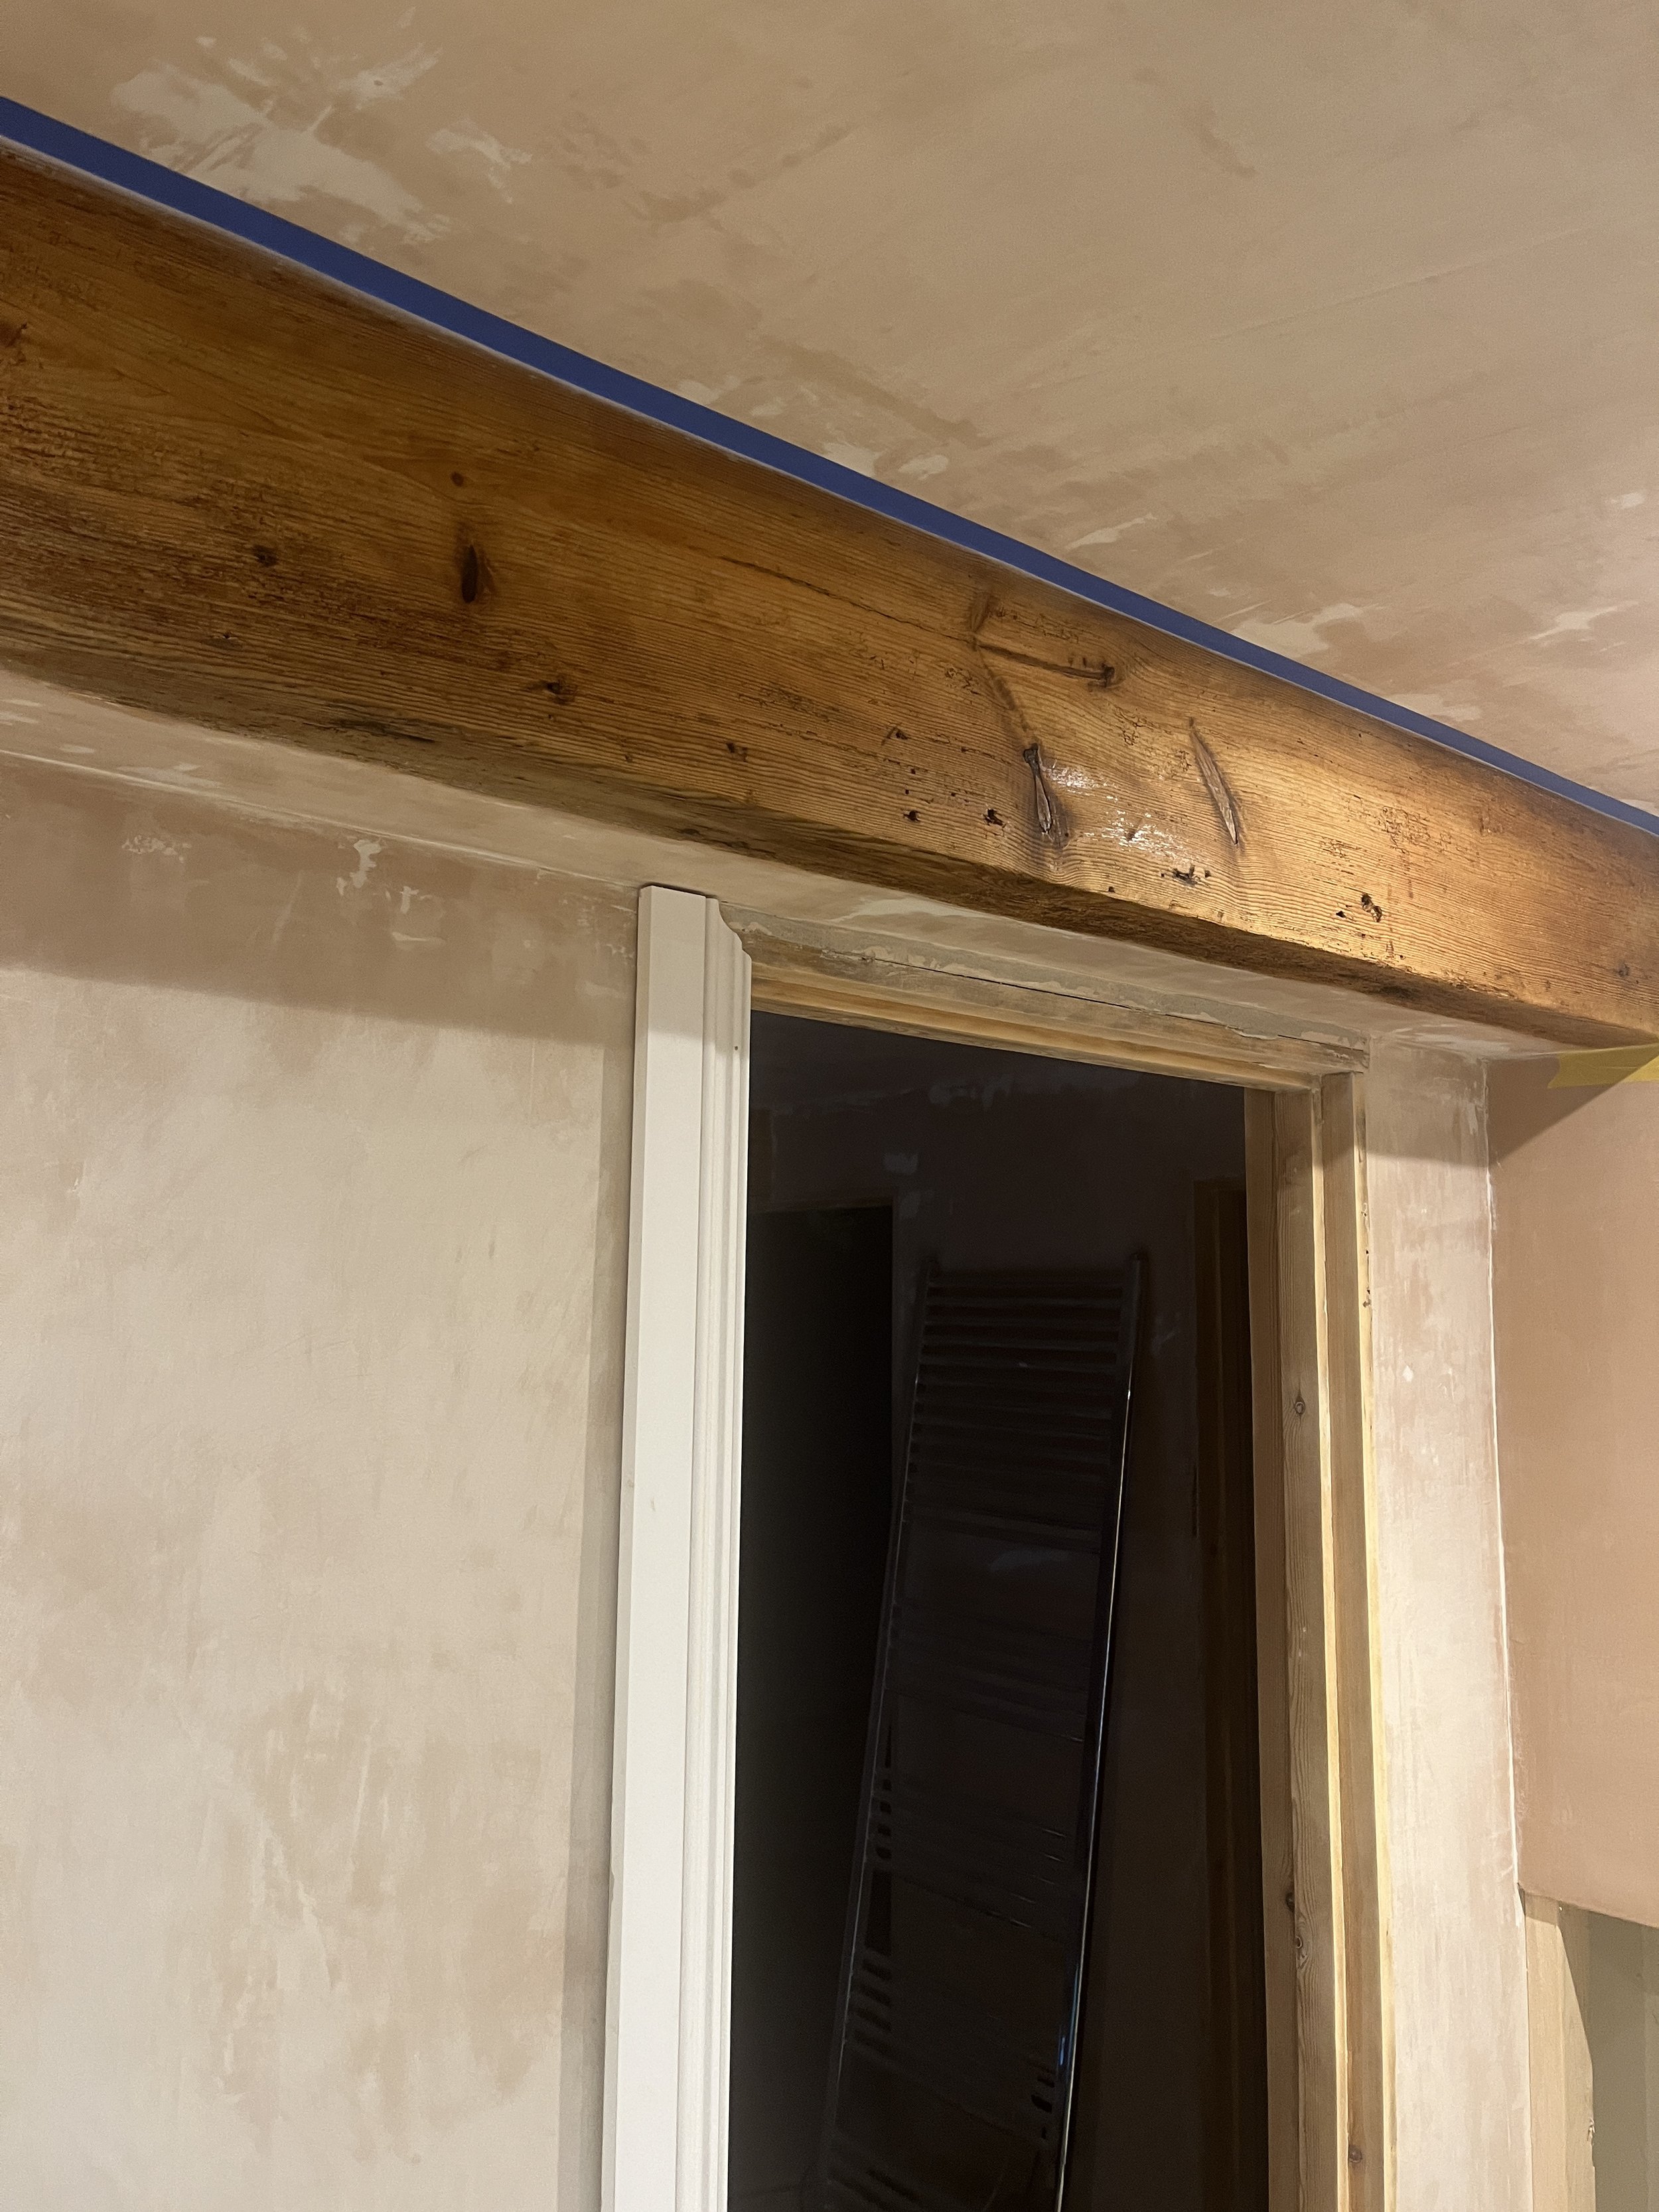
Clear Matt 3062 is a transparent, non-pigmented oil with a very matt finish, so when it’s applied it gives a ‘barely there’ effect. As I wanted to highlight the natural beauty of the wood, this was just right for the Cottage. The team at Osmo provided me with the oil (PR product), and I set about preparing to apply it. I taped off surrounding surfaces, like the plastered ceilings and walls, with Frogtape, and applied the Osmo using an Osmo paintbrush. A little goes a very long way with Osmo, so it’s important not to apply too much else the finish won’t be so great. I applied two very thin coats, allowing the first coat to dry overnight before the second was applied, and the finish is just stunning. It is subtle, but gives the wood a well-nurtured richness that they were lacking before, highlighting the grain of the timber and embracing all the imperfections that years of holding up a roof will give you!
I still have the Oak beams above the barn window and on the staircase to finish over the next few weeks, so stay tuned for that, but all in all I’m really pleased with how we’ve managed to bring these beams back to life, and make them a really beautiful feature in each room. Now, after that little bit of love, they should last for many years to come!