The Cottage
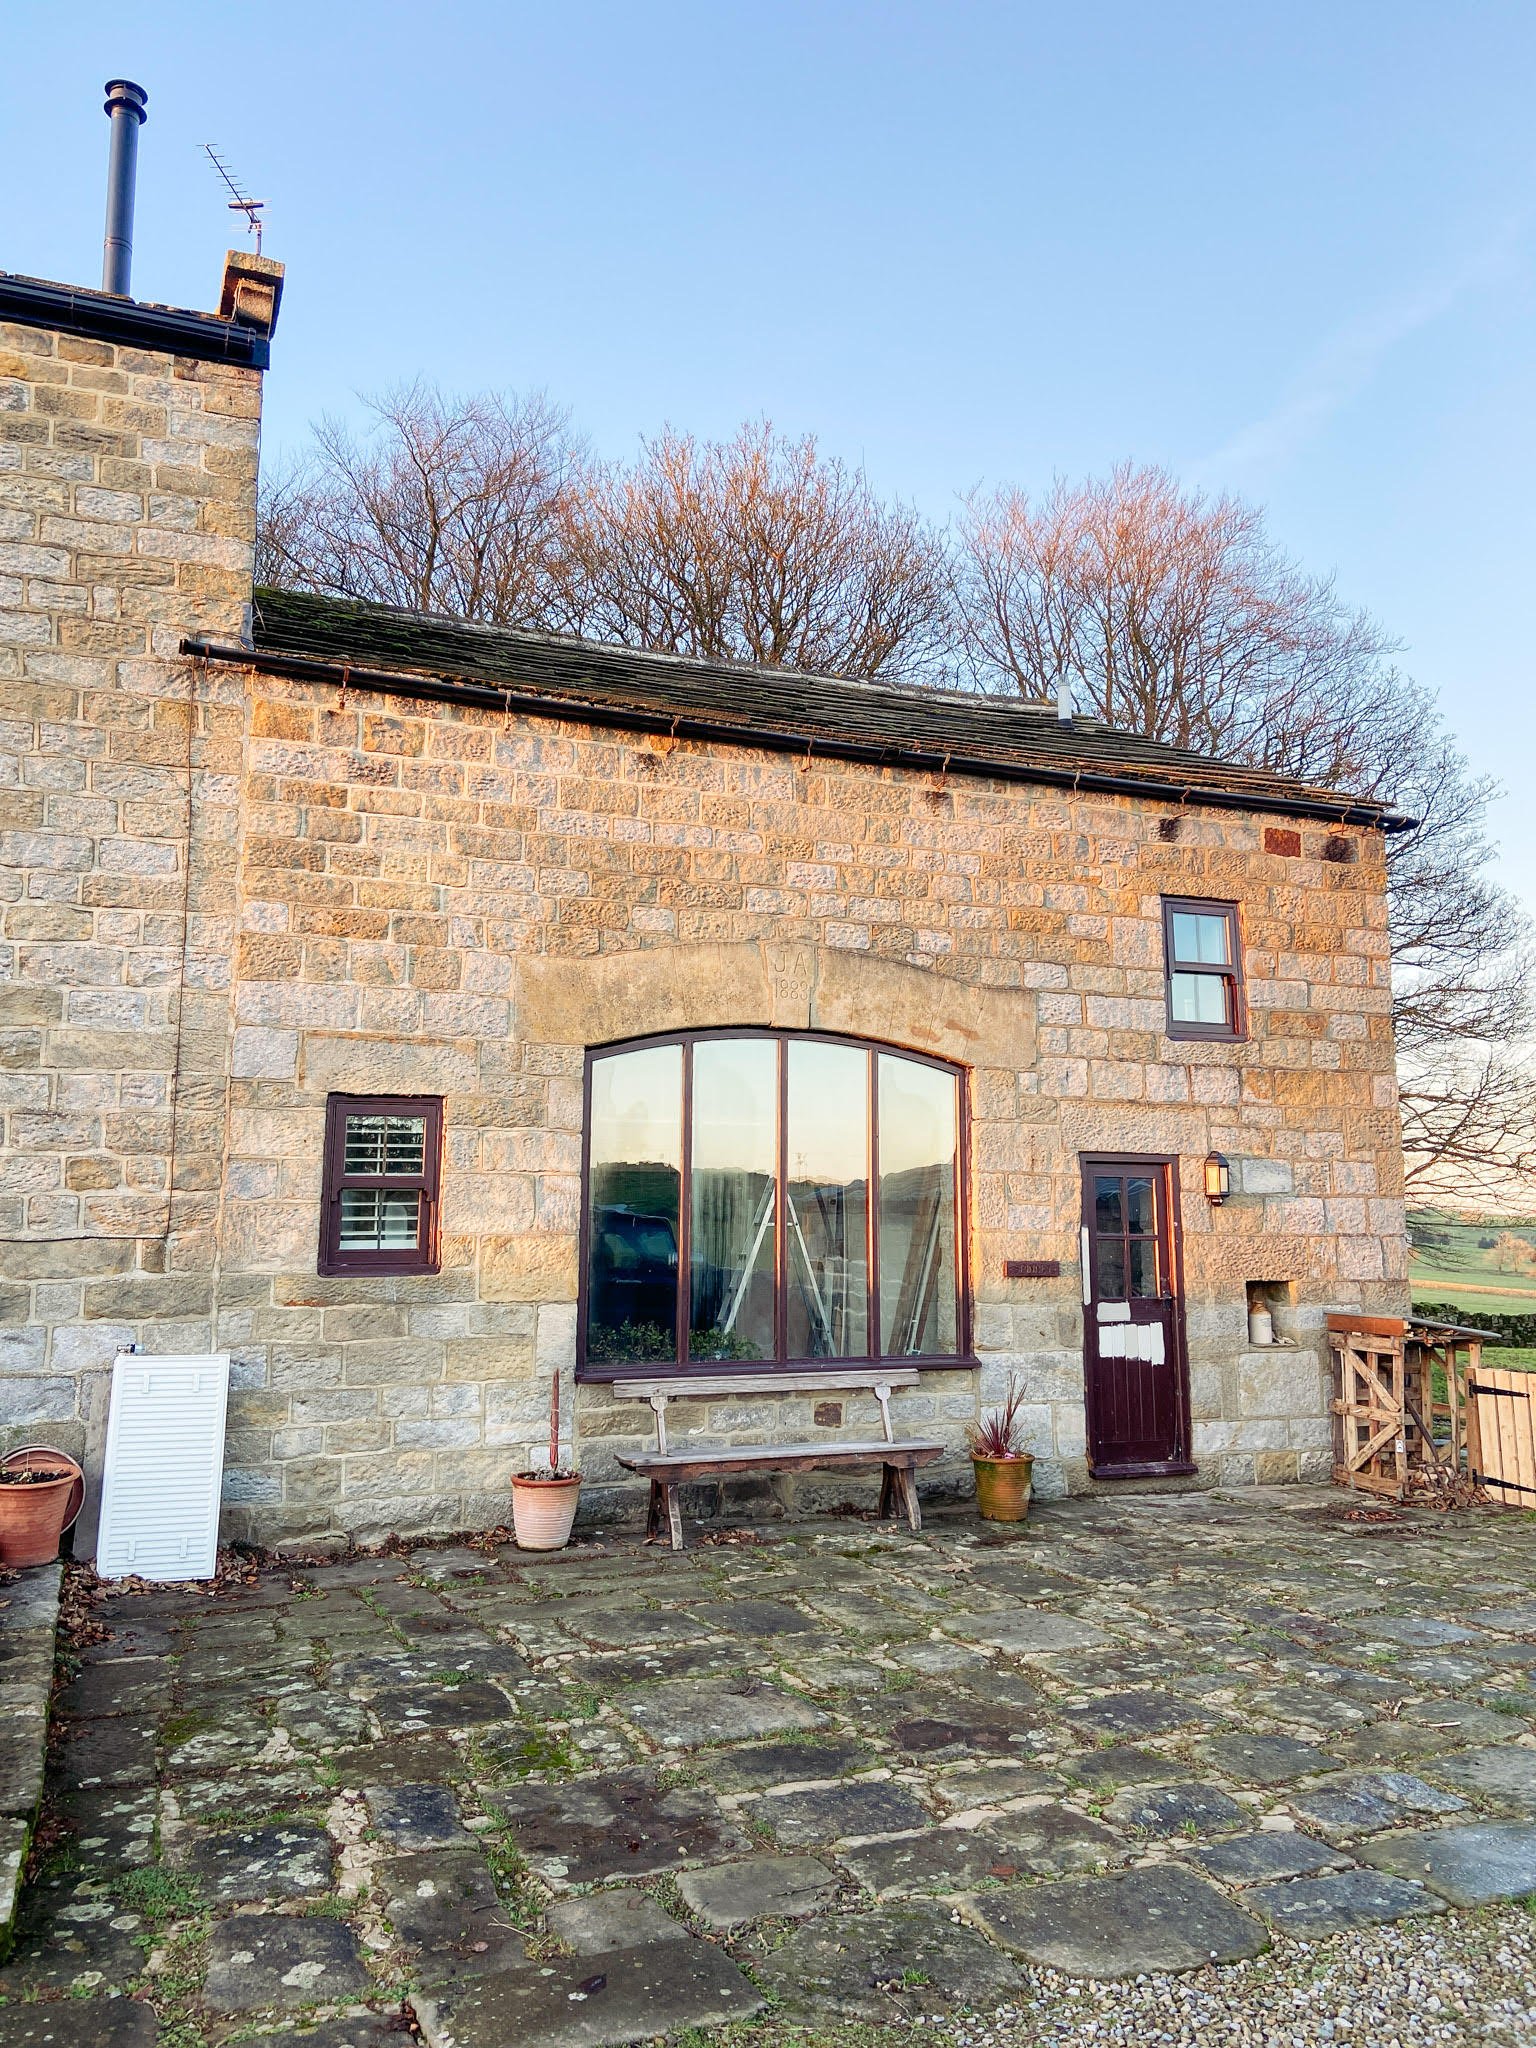
The Cottage, photographed in December 2021.
If you’ve been following our journey for any length of time, you may already know that the Cottage is the first of the houses we are renovating at the Farm. It’s is stone built, shares a party wall with the Mistal, and began work on it back in July 2021. As we are now mid-way through the renovation, I thought it would be useful to put together a room-by-room breakdown of the property and to explain the work we’re doing. Let’s start with a little introduction to the house…
At a little over 1000 square feet, it’s the smallest of the three houses we have here.
And it’s also the youngest, dated to 1883 by carved keystone above the arched window. Originally built as a barn when the property was a working farm, it was converted in the 1980s into a holiday let with accommodation spread over two floors. Originally there would have been a large open space on the ground floor level, with a simple hay loft upstairs accessed by a ladder, used to store grains and feed. The first floor, many of the windows and staircase were added to the property during the conversion, and the space divided into rooms. The conversion used materials that were popular and readily available at the time, predominantly concrete and cement, and did not use insulation. Whilst the external walls are the original stone, the internal walls are either stud or built from Aircrete blocks.
Over recent years, the condition of the Cottage has deteriorated as the windows failed and frames rotted. The lack of insulation and use of cement and concrete caused the stone walls to sweat, leading to major damp problems (more on that in my recent blog post, Dealing with Damp). In order to get to the root of the damp, we need to strip the Cottage back to its bare bones, and effectively start from scratch, so our renovation really begins with demolition. This will involve removing as much of the existing cement and concrete as possible from the walls, and replacing with lime, a traditional material which is breathable and better suited to stone and brick built buildings, and replacing all windows and doors at the Cottage with thermally efficient alternatives.
I hope you enjoy reading about our plans for the Cottage, and I have included some floorplans in this post, which I haven’t shared previously. Hopefully this will give you an idea of the space as it stands, and the changes we are making. We are carefully restoring the Cottage the hope of creating a welcoming, beautiful and inspiring space that can house family, friends and guests for years to come.


The Bootroom
As you walk through the front door of the Cottage, the Bootroom is the first space to greet you, and in the original conversion housed a washing machine and dryer for guests. The room is particularly dark, with artex-like cement rendered walls, and wet and mouldy stone walls. The flagged floor showed signs of salting, which was exacerbated by the poorly fitting front door, which over the years had rotted, allowing rainwater into the house.
We removed the utilities, tiles, and worktop from this room, and stripped the render from the external stone walls. We removed any cement pointing, and repointed with lime mortar, and skimmed the internal walls. Once the mortar had dried, we began replastering in lime, to ensure the stone walls could breathe. As the Bootroom will be a high-traffic area, we decided to plaster using an unusual material called Hemp Lime plaster, which is made from a combination of plant fibre and lime plaster, is very durable and has added thermal benefits, which will help us to increase the thermal efficiency of the Cottage.
The plaster is now at a stage of curing, which can take several months to complete during the colder winter weather. We hope it will be dry and ready for painting by Spring, when we plan to clean the existing stone floor, and install a large column radiator, to allow guests to dry their muddy boots after long walks along the neighbouring footpaths. A new front door is being made, and will be fitted in just a few weeks time, which will allow more light into the room, and with the addition of a few spotlights will help to transform the Bootroom into a bright, welcoming space.


The Cloakroom (WC)

Oak peg rail at the Loovre.
The Cloakroom, a slightly pretentious way of saying WC, is a pretty teeny room, and was home to a large glass sink, and toilet underneath the window. As the Cottage is a solid walled property, the plumbing cannot be concealed within the walls, and instead is either exposed or boxed in. This room has one external wall, which houses a small, east-facing window.
As the external wall in this room is a particularly small area (just over 1m2, taking the window into account), we made the decision not to lime plaster this wall, but instead to skim over the textured render with gypsum. Once skimmed, Will built a frame for a half height wall, which will be finished in tongue and groove, and will conceal the plumbing for the new, smaller wall-hung sink, and a new back-to-wall toilet which will be rotated to sit against the internal wall. A tall towel rail has been fitted, and the current window will be replaced, this time with privacy glass to ensure no awkward moments!
As in the Bootroom, we have kept the lovely stone flagged floors in here, and will clean and refinish them, as well as adding a few spotlights to brighten the room. An oak peg rail will be added behind the door to store coats, inspired by the lovely Hugo who I met whilst visiting Berwick upon Tweed, where he has done a fantastic job of restoring a Victorian public toilet into a quirky holiday let, aptly named the Loovre.


The Foyer & Staircase
Accessed from the Bootroom, the Foyer is a double height hallway, with the potential to be a breathtaking space. Flooded with natural light from the enormous south-facing barn window, it has a stone flagged floor and a timber kite-turned staircase that leads you upstairs to the bedrooms and bathroom via a mezzanine landing. When we viewed the Cottage, the Foyer was used as a dining area. A window seat ran the full length of the barn window, with a dining table and chairs pushed against it. Glazed french doors opened into the space from the Lounge, and the barn window was adorned with plantation style shutters, which blocked access to the stairs. The space felt like a cluttered and cumbersome walk-through, as opposed to the calm, grounding space it could be.
The Foyer was entered via a plasterboard arch, which was so low that anyone taller than 5”8 had to duck as they walked through, or otherwise risk a concussion! We straightened out the archway, and removed cement render, the window seat, and the breezeblock wall that supported it. Under the breezeblock we found the original stone threshold, protected by a layer of plastic damp proofing (watch that here). Dad painstakingly knocked out the cement pointing from the double height wall, and repointed in lime, balancing rather precariously on a scaffolding tower and making use of his height to reach the very top areas.
We still have a lot of work to do in this space, including replastering at least some of the external wall in an insulated lime plaster to keep the Cottage warm. We also plan to replace the existing barn window, taking it back to floor level as it would have been for a hundred years. Mum has worked hard on stripping the staircase of layers of gloss paint, and three layers of carpet, and we will sand and repaint the staircase. Our goal is to remove the clutter and create a welcoming space to sit and watch the world go by, celebrating the natural light alongside the dramatic double height.
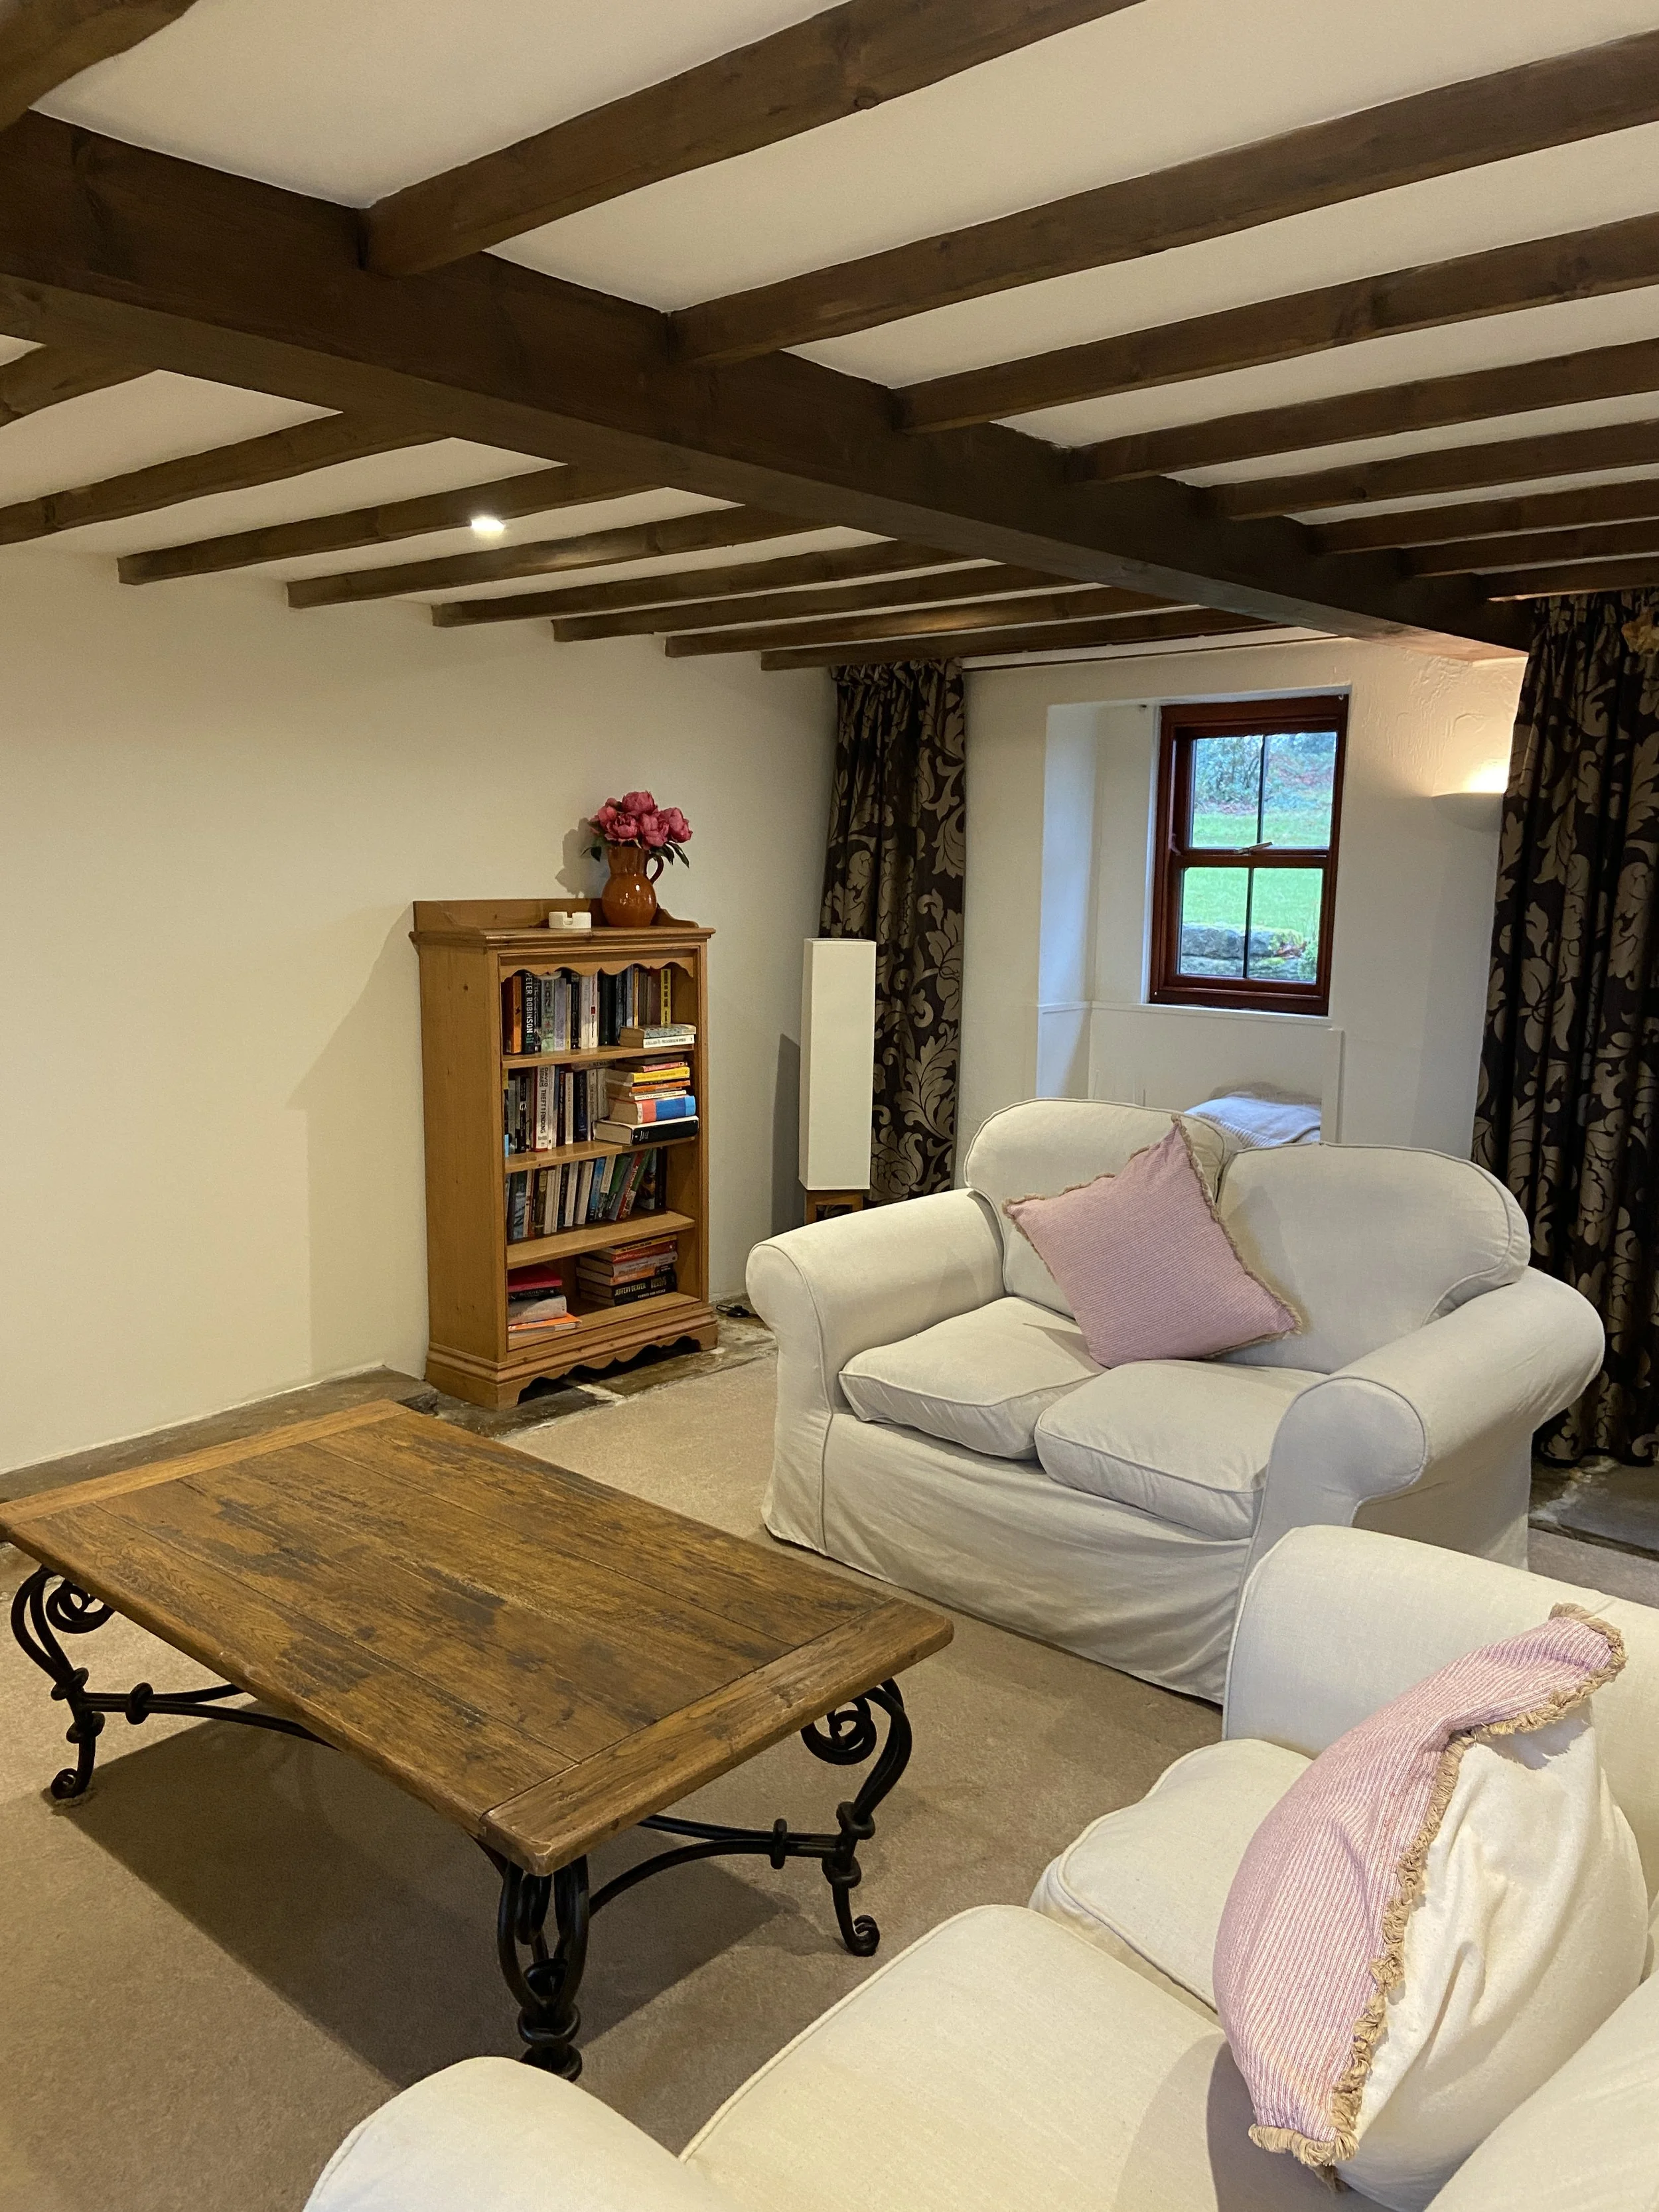


The Lounge
The Lounge can be accessed via the Foyer or Kitchen, and was the first room we tackled. It’s a large, well-proportioned room, but with an unusual floor made of stone flags around the perimeter, and a square of carpet in the centre. A stone built TV stand stood in one corner, and large curtains on the external wall hid a major damp problem. The stone flags in the Lounge were too badly damaged to be salvaged, the paint was peeling, and the plaster was cracked and blown on both the external wall and the party wall between the Mistal and the Cottage.
We knocked out the stone TV stand, and found a false wall, built 6 inches in front of the party wall. Behind this was a tanking system, under which was cement render, under which the original lime plaster wall was covered in black mould. We again repointed in lime (we should have put pointing on our resumes by now), replastered the external wall using Cornerstone Insulating Render from Cornish Lime, and had an Esse 550SE Stove fitted. On the party wall, we decided to make the most of the beautiful dressed stone we found hidden under the tanking, and plastered a third of the way up the wall to conceal the exposed foundations, which are above ground level in the Cottage as it is built on a hill.
We skimmed the internal walls with gypsum to cover the textured render, and have fitted a beautiful radiator. We plan to lay a wooden floor to play on the natural tones of the exposed stone in the room, and will hang new wall lights to brighten up the space on darker days.
The Kitchen
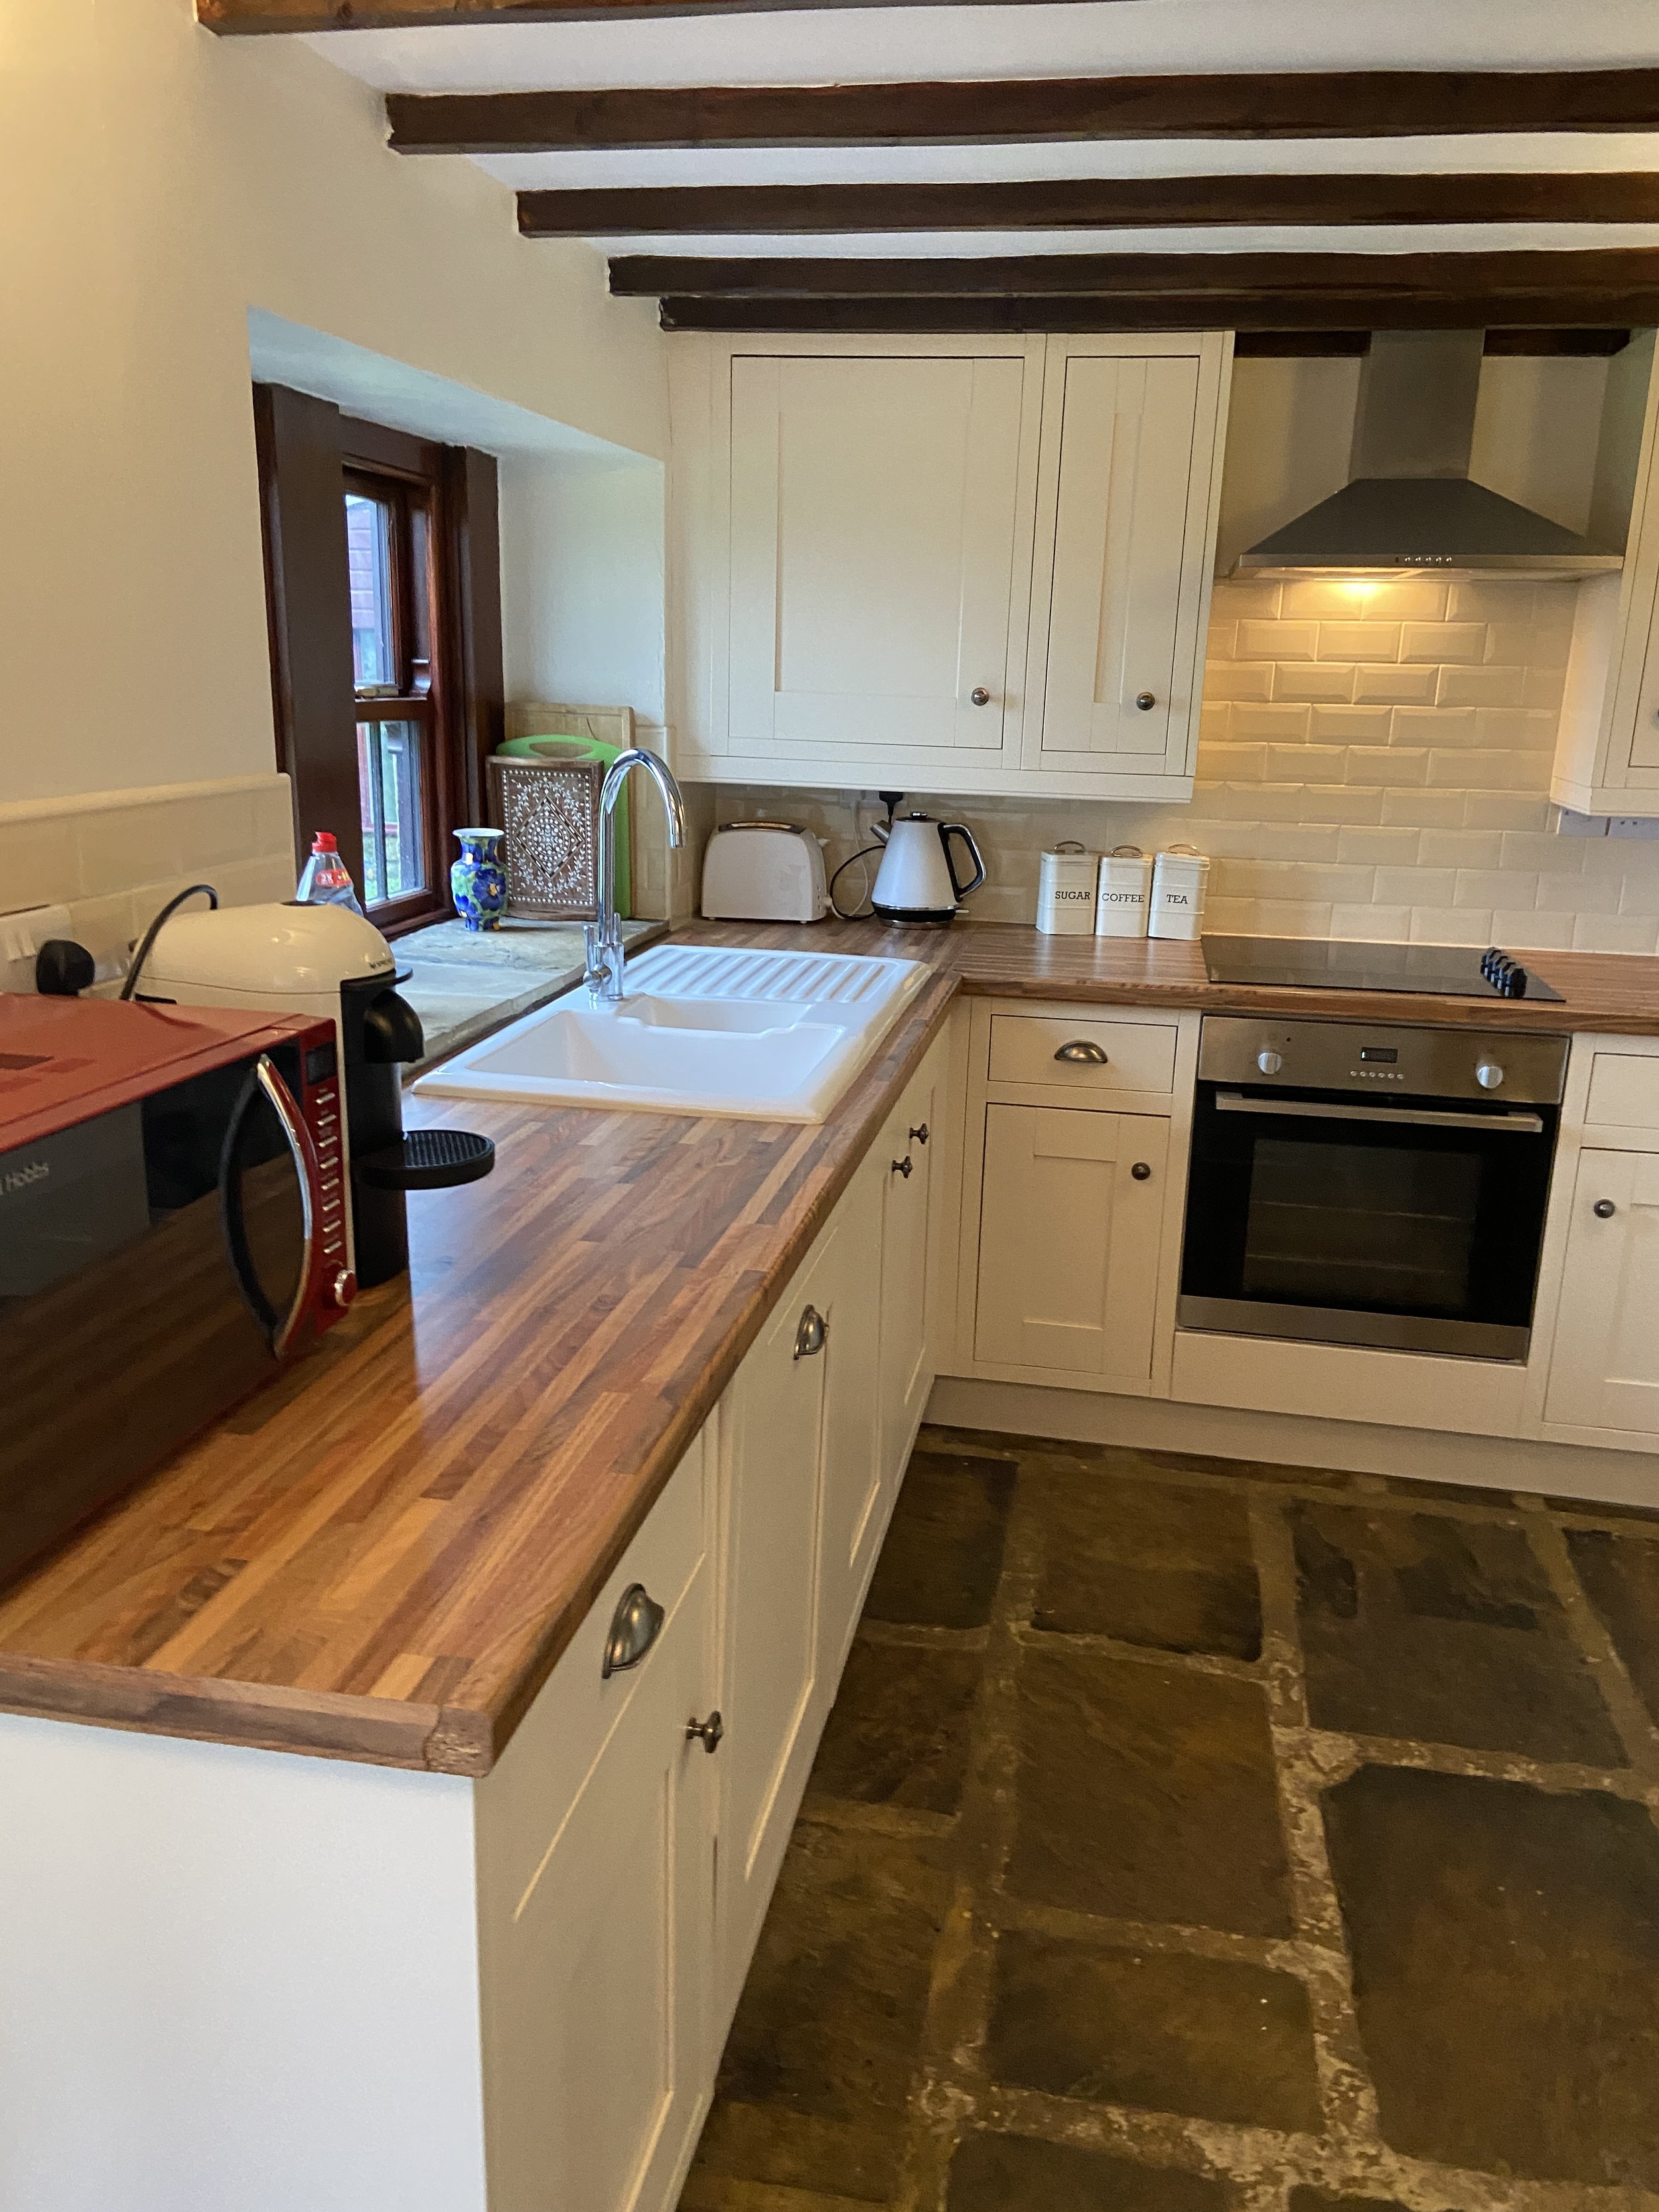
The Kitchen: Before
This is the one room in the Cottage that we plan to leave almost ‘as is’. A new kitchen is out of our budget right now, and the logistics of needing to move a boiler and consumer unit in order to remove plaster is a bridge too far for my brain to comprehend at the moment! The existing Kitchen is just a few years old and is a simple cream shaker style, with a lovely ceramic sink, laminate worktops and a cream metro tile upstand. I’m pretty confident that with a couple of clever tricks, such as painting the cabinets, new tiles and radiator, and perhaps an update to the worktop, we can elevate what is already in place and make the space feel brand new without blowing our budget.


Bedroom 1
The largest of the two bedrooms, Bedroom 1 was rather long and skinny. It has one small north-facing window in this room, and is a very cold room. It was separated from Bedroom 2 by an interlocking stud wall, which created a built in wardrobe in Bedroom 2, and an alcove for a louvre-doored wardrobe and dressing table in this bedroom. The wardrobe was the first thing we removed, and we demolished the interlocking stud wall which jutted into this room, opening the space and improving the proportions. We removed plasterboard from the external wall, and found the stone behind had been battened and boarded without insulation, which was causing the cold. We removed cement pointing and replaced in lime, and will be beginning to replaster in this room in late February/early March.
We need to stud and plaster the wall between the two bedrooms, and add sound proofing, and also plan to move the doorway in this room. We will turn it to face the barn window across the mezzanine, which should allow more natural light into the room, brightening the space and creating a cosier, less cavernous bedroom.


Bedroom 2
A second, good sized bedroom, this room certainly has a more straightforward layout than its neighbour. This room has two external walls, and a window on the east elevation with stunning panoramic views across the valley, however the window itself has all but disintegrated! The internal wall housed the wardrobe that interlocked with the bedroom next-door, but could only be accessed when the bedroom door was closed. Like Bedroom 1, this room was very cold. We removed the plaster from the east wall to find it was battened and boarded in the same fashion as in Bedroom 1, however, the north wall was rendered in the thickest render we have found so far- over 3 inches thick in places. Removing that was no mean feat, and resulted in my needing a recovery day!
I am hoping to be able to begin removing the mortar in this room this weekend, and will start to repoint in lime over the coming weeks. Once the pointing is sound and dry, we can then begin to replaster at the same time as we do Bedroom 1.
Bathroom

The Bathroom: Before.
The bathroom is a brilliant size, and currently houses a toilet, sink, shower and towel rail. Whilst there’s nothing inherently wrong with this space, it’s not quite to our taste and some of the tiles have cracked over time. We would also like to include a bath in this room, as with a bit of reconfiguring there should be plenty of space for one! We will be changing the layout to accommodate this, and are on the lookout for some beautiful, natural looking tiles to bring the space to life.
Hopefully this post has helped to clarify some of the details of the Cottage, and has offered an explanation as to why we are going to the extent we are in order to improve the house. I’m so aware that in photos, the Cottage somehow looks absolutely fine in the before photos, when in reality it was in a very poor condition just under the surface. If you have any questions, as always pop them below and I will be more than happy to answer them if I can.


Watch the ‘before tour’ of the Cottage on IGTV here